How to Replace Front Strut & Spring Assemblies 2012-2018 Nissan Altima
Shop TRQ on 1AAuto.com
Strut & Spring Assembly Set
Strut & Spring Assembly
Strut & Spring Assembly
Shop TRQ on Amazon
Strut & Spring Assembly Set
Strut & Spring Assembly
Strut & Spring Assembly
This video shows you how to install new reliable TRQ struts in your 2012-2018 Nissan Altima. TRQ Struts are made to fit your vehicle exactly, just like the original part. Struts can wear out as early as 50,000 miles. You should inspect them regularly for leaks or wear. Save time, money, and hassle by replacing an entire strut assembly.
This repair was done on a 2016 Nissan Altima Base 2.5L Sedan 4-Door FWD Automatic and the process should be similar on the following vehicles:
2012 Nissan Altima
2013 Nissan Altima
2014 Nissan Altima
2015 Nissan Altima
2016 Nissan Altima
2017 Nissan Altima
2018 Nissan Altima
Check out our playlist:
Nissan Altima 5th Generation 2012-2018:
📱 Download the TRQ Auto Repair App for more videos, torque specifications, and car repair information:
⚠ DISCLAIMER:
While TRQ strives to make the information provided in this video as accurate as possible, it makes no claims, promises, or guarantees about the accuracy, completeness or applicability of the content. No information contained in this video shall create any expressed or implied warranty or guarantee of any particular result. All do-it-yourself projects entail some risk. It is the sole responsibility of the viewer to assume this risk. TRQ is not responsible or liable for any loss damage (including, but not limited to, actual, consequential, or punitive), liability, claim, or any other injury or cause related to or resulting from any information posted in this video.
6:42 Saying Pause within in DIY Mechanical video is Diabolical
If you don’t remove the hub from the axle, be sure not to overextend your CV joint.
This car is from the rust belt
DO NOT USE VISE GRIPS ON THAT SWAY BAR LINKAGE !!!!! Use a 19mm open end wrench or else you’ll strip the hex nut backing nut
Comments are closed.
How to Replace Front Strut 2007-12 Nissan Altima
Shop TRQ on 1AAuto.com
Strut & Spring Assembly Set
Strut & Spring Assembly
Strut & Spring Assembly
Shop TRQ on Amazon
Strut & Spring Assembly Set
Strut & Spring Assembly
Strut & Spring Assembly
TRQ Struts are made to fit your vehicle exactly, just like the original part. Struts can wear out as early as 50,000 miles. You should inspect them regularly for leaks or wear. Save time, money, and hassle by replacing an entire strut assembly. This video shows you how to install new reliable TRQ struts in your 2007-12 Nissan Altima.
• Check here for more videos on the 2007-12 Nissan Altima:
This repair was done on a 2012 Nissan Altima Base 2.5L and the process should be similar on the following vehicles:
2007 Nissan Altima
2008 Nissan Altima
2009 Nissan Altima
2010 Nissan Altima
2011 Nissan Altima
2012 Nissan Altima
Tools you will need:
• Flat Blade Screwdriver
• Pry Bar
• 13mm Wrench
• 21mm wrench
• 13mm Socket
• 18mm Socket
• 21mm Socket
• Locking Pliers
• 3/8 Inch Impact Gun
• Ratchet
• Socket Driver
• Torque Wrench
• Floor Jack
• Jack Stands
Subscribe:
Check out our playlist:
Nissan Altima 2007-2012 4th Gen:
📱 Download the TRQ Auto Repair App for more videos, torque specifications, and car repair information:
⚠ DISCLAIMER:
While TRQ strives to make the information provided in this video as accurate as possible, it makes no claims, promises, or guarantees about the accuracy, completeness or applicability of the content. No information contained in this video shall create any expressed or implied warranty or guarantee of any particular result. All do-it-yourself projects entail some risk. It is the sole responsibility of the viewer to assume this risk. TRQ is not responsible or liable for any loss damage (including, but not limited to, actual, consequential, or punitive), liability, claim, or any other injury or cause related to or resulting from any information posted in this video.
Do I gotta brace the strut? Imma do it right now I hope this strut don’t blow my face off
We support you 👍
Just curiousity, does it have to be loaded / on the ground conditions when tighten the knuckle bolt nuts into torque spec?
I tried to installed new shocks but those weird duk duk sound keep happening when hit at speed bump or bumps. 😢
Hey also to the guys that do this by themselves without a car lift and with just jack stands in order to get that front ball joint to line up with u slot u have to jack up the other side of the car so that it levels out for u in order to do that just thought I would let other people know for the guys like me who had to figure out how to do it 😊
Comments are closed.
How to Replace Front Struts 2012-2018 Nissan Altima
Buy Now!
New Strut & Spring Assembly Set from 1AAuto.com
New Strut & Spring Assembly from 1AAuto.com
New Strut & Spring Assembly from 1AAuto.com
This video shows you how to install new front struts on your 2012-2018 Nissan Altima. Struts are made to fit your vehicle exactly, just like the original part. Struts can wear out as early as 50,000 miles. You should inspect them regularly for leaks or wear. Save time, money, and hassle by replacing an entire strut assembly.
Estimated installation time for a professional technician is approximately: 2 hours 48 minutes
This repair was done on a 2013 Nissan Altima S 2.5L Sedan 4-Door FWD Automatic and the process should be similar on the following vehicles:
2012 Nissan Altima
2013 Nissan Altima
2014 Nissan Altima
2015 Nissan Altima
2016 Nissan Altima
2017 Nissan Altima
2018 Nissan Altima
Check out our playlist:
Nissan Altima 5th Generation 2012-2018:
📱 Download the 1A Auto Repair App for more videos, torque specifications, and car repair information:
🚗 For More Info visit us at
⚠ DISCLAIMER:
While 1A Auto strives to make the information provided in this video as accurate as possible, it makes no claims, promises, or guarantees about the accuracy, completeness or applicability of the content. No information contained in this video shall create any expressed or implied warranty or guarantee of any particular result. All do-it-yourself projects entail some risk. It is the sole responsibility of the viewer to assume this risk. 1A Auto is not responsible or liable for any loss damage (including, but not limited to, actual, consequential, or punitive), liability, claim, or any other injury or cause related to or resulting from any information posted in this video.
Excellent video! You’re a great instructor, very articulate, great camera work. Now I’m ready to replace the struts and shocks on my 2014 Altima 2.5S, thank you!
How dangerous is this? I thought you had to like clamp the strut’s spring down and that could be extremely dangerous. I don’t see you doing that in the video, am I thinking of something else?
So who did this video trq or you Guys
Great video…very informative. Gonna do mine tomorrow! 👍🏻
Comments are closed.
✅ Top 5 Best Mirror Dash Cams of 2025 [watch before you buy one]
Top 5 Best Mirror Dash Cams of 2025 | Links To Products ⤵️
With Amazon Prime, shipping is FREE! 🎁 Get a 30-DAY FREE TRIAL by signing up here 👉
Looking for the best mirror dash cams in 2025? In this video, we’ve researched and reviewed the top 5 mirror dash cams to enhance your driving experience and boost your road safety. Whether you’re looking for stunning 4K video quality, advanced features like night vision and ADAS, or a budget-friendly option, our list covers the best dash cams to suit all types of drivers and budgets. From the high-performance WOLFBOX G840S to the feature-rich Pelsee P12 Pro and more, these mirror dash cams offer crystal-clear footage, smart functions, and user-friendly designs. Watch until the end to find the right fit for you, and check the description for links to the best deals on each model!
⏰ Timestamps
00:00 Intro
00:41 Best Overall Mirror Dash Cam
02:24 Best Value for Money Mirror Dash Cam
04:14 Mirror Dash Cam with the best Night Vision
06:14 Most Affordable Branded Mirror Dash Cam
08:02 Best Budget 4K Mirror Dash Cam
▶️ Subscribe for more content (IT’S FREE):
►Disclaimer◄
All thoughts and opinions expressed in this video are unique to Top Tech Picks. If you have any issue with the content or a material belong to you and you want it removed, please do not hesitate to contact us at lifedrivemedia[at]gmail.com
Top Tech Picks is a participant in the Amazon Services LLC Associates Program, an affiliate advertising program designed to provide a means for sites to earn advertising fees by advertising and linking to Amazon.com. As an Amazon Associate, I earn from qualifying purchases.
Affiliate commissions help fund videos like this one at no additional cost to you. Thanks for your understanding.
Thanks a lot for watching, if you are any questions feel free to ask in the comments.
Wolfbox is one of the worst, the reviews on amazon prove that.
Hello. Can this product’s rear camera be mounted on the license plate area? Also, is it waterproof against rain and car washes? I cannot mount it on the rear window because my car is a sedan (2012 Fiat Linea), so the bumper area would remain a blind spot. I think mounting it near the license plate would solve this. What do you think?
Do any of these record the inside of the vehicle????? (A must have for rideshare drivers)
Ja mam Pelsee12plus.. ..ale nie mam polskich komunikatów, co czyni tą kamerę mało użyteczną. ..jak pozyskać spolszczenie?
Comments are closed.
WOLFBOX G840S 12 4K Mirror Dash Cam Backup Camera, 2160P Full HD Smart Rearview Mirror Review
WOLFBOX G840S 12 4K Mirror Dash Cam Backup Camera, 2160P Full HD Smart Rearview Mirror Review
✅ Amazon Shop Link:
✅ International Shop Link:
*Affiliate/referral links may be used above…We make a small comission on those and always appreciate you shopping with us! As always, all opinions are 100% our own and honest thoughts! We only share products We’ve used and love ourself 🙂
5 Comments
this thing looks amazing
Is it a setting to look on inside of car
I’m thinking of getting this for my minivan, but my concern is, I use the carwash 3 times a week and I’m concern it would damage the camera or rip it off my bumper. I am going to see if it can be installed on the inside somehow.
Does nobody want to show where the red cable goes?
What is the point of this red wire on the back camera cord ?
Comments are closed.
Wolfbox G900 4k Dashcam Mirror with Backup Camera installation
4k Wolfbox G900 dash camera and backup cam dvr with location GPS and KPH MPH speed tracker is a best seller on amazon see here:
Wolfbox website:
use discount code: Paulfusco
Learn more about Tech and how to fix electronics, Subscribe to TampaTec here-
Thanks for Watching and Please Subscribe and hit that bell 🔔
My Favorite Tech listed below in my Amazon Shop,
We are a participant in the Amazon Services Associates Program, an affiliate program designed to provide a means to earn revenue
My Amazon Tech videos-
-These products I order myself and some I receive for free to produce a How-to guides or review but I’m not paid for positive tech reviews. #dashcam #backupcamera
#installs #repairs #tech #tampatec
5 Comments
Am i able to plug out the cords from the mirror and get a new one without reinstalling anything like the wires
@TampaTech Can you view your camera in real time from your phone when it’s parked? Thanks for the great video.
Is it possible to connect it to the power of the car without using the plug?
Buddy you didn’t even heat up the connecter so no wster gets in it
I had mine installed professionally and don’t like it at all. The front camera récords only the left half because the right side is blocked by the mount of my mirror. The image resolution on the rear camera is extremely low to the point that you can’t really distinguish the cars a few yards behind you. You can see there is a vehicle back there, but you can’t tell if it is a regular vehicle or a patrol car. I’m in the process of removing it and installing the Viofo a229.
Comments are closed.
Best Batteries for Diesel Trucks || Top 5 Diesel Batteries Buying Guide
⏬ Check the updated price of Batteries for Diesel Trucks on amazon.
✅01.ACDelco AGM Battery:
✅02.XS Power D3400 XS Series AGM High Output Battery:
✅03.Deka 9A34 AGM Intimidator Battery:
✅04.Odyssey Automotive and LTV Battery:
✅05.Optima Batteries RedTop:
⏬Special Offer:
►Try Prime Discounted Monthly Offering:
►Try Amazon Home Services:
►Try Amazon Prime 30-Day Free Trial:
►Prime Student 6-month Trial:
►Disclaimer◄
TechEmpire is a participant in the Amazon Services LLC Associates Program, an affiliate advertising program designed to provide a means for sites to earn advertising fees by advertising and linking to Amazon.com. As an Amazon Associate, I earn from qualifying purchases.
Some of the footage used in this video is not original content produced by TechEmpire. Portions of stock footage of products were gathered from multiple sources including, manufactures, fellow creators, and various other sources. If something belongs to you, and you want it to be removed, please do not hesitate to contact us at thearif87[at]gmail.com.
3 Comments
Don’t buy batteries in Florida there as bout as bad as desantis
Dont waste your time… AI
Take your AI bullshit and shove it
I’m out
Comments are closed.
DIESEL TALK | XS BATTERIES
Diesel engines put a hard demand on their batteries, especially starting in harsh weather conditions. Add a winch, lights, and subwoofer and most off-the-shelf batteries begin to fail. XS Batteries are built for hard use and will take the punishment for years to come.
Check Out Our Podcast! // America’s Diesel Podcast:
———————————–
Presented By Diesel Power Products💪
No Salesmen 👉 Just Enthusiasts
Online at: Dieselpowerproducts.com 🌐
Talk To An Diesel Expert:
PHONE: 888-99-DIESEL (888-993-4373)
EMAIL: sales@dieselpowerproducts.com
LIVE CHAT: Dieselpowerproducts.com
4 Comments
Powerful execution Ben
Shit at that price they should offer a 10 year warranty lol
Why would you use 2 batteries versus 1 battery & 1 super bank? 1999 F250 7.3L looking to upgrade.
I saw Stapleton 42 diesel upgrade with the 1 superbank setup & 1 battery.
Hello.. I have 05 corvette with a sound system. I upgraded my alternator to 325 or 360 amp . What fitment XS battery would I need? I also upgraded wires from alternator and battery .
Comments are closed.
Diesel Truck Battery: OPTIMA REDTOP or YELLOWTOP?
If you have a diesel truck and want to upgrade your battery to an #OPTIMAbattery we’ll help you decide between and REDTOP or YELLOWTOP…or let you know if that’s even a choice! Learn more here:
CORSA® Mustang GT S550 Tip Adjustment How To Video
How to adjust tip spacing on the 2015-2018 Ford Mustang GT:
1. Loosen the Axle-Pipe hanger grommet bolts
2. Passenger Side: Pull down on Axle-Pipe with left hand, and push up on muffler with right hand.
3. Snug Axle-Pipe clamp
4. Driver Side: Pull down on Axle-Pipe with right hand, and push up on muffler with left hand.
Snug Axle-Pipe Clamp
How to Find the Best Exhaust For You | Mustang Exhaust Buying Guide | Tech Tip
As said in this video #exhaust tone, volume, and overall sound is a subjective modification. Others may hate what one person thinks sounds perfect, and vice versa. With so many options and opinions out there, you really need to look for something that you will be happy with, not others. It is your car after all. Today we’ll be going over all the different types of exhaust modifications you can make, from #h-pipe vs #x-pipe to #axle-back vs #cat-back.
Shop All S550 Exhaust from Steeda:
Shop All 11-14 Exhaust:
Shop All 05-10 Exhaust:
Subscribe:
Shop Ford performance parts at www.Steeda.com!
—
Steeda Website:
Steeda Performance Vehicles
Steeda UK:
Steeda Europe:
Steeda Pinterest:
Steeda Facebook:
Steeda Instagram:
Steeda Twitter:
Steeda Blog:
0:00 Intro
0:32 Resonator Delete
2:31 Stepping it Up
3:37 One and Done Solution
4:11 What are you Trying to Achieve?
4:31 Unique Sounds
6:00 Sound Clips
7:30 Wrapping Up
5 Comments
I have a ’15 S550 and I’m looking for a deeper tone, not too loud and as little drone as possible (quad tips too, just for style points), I’m assuming I just need an H pipe, Cat Back and rear valance to fit the quad tips but can anyone recommend the best setup if I’m wrong? I’m a bit of a novice
F150 ecoboost with H pipe vs x pipe etc.
What’s best mustang exhaust for burbles?
5:22 7:20
Awe touring exhaust is the best
Comments are closed.
How to Replace Headlights 2006-2012 Toyota RAV4
Shop TRQ on 1AAuto.com
Headlight Assembly
Headlight Assembly
Headlight Set
This video shows you how to install new, quality, TRQ headlight assemblies on your 2006-2012 Toyota RAV4. Over time, headlight lenses become dull and hazy. You’d be surprised how much that affects your night time visibility! Replacing your headlight assembly is an easy way to improve safety and appearance on your vehicle.
Estimated installation time for a professional technician is approximately: 24 minutes
This repair was done on a 2010 Toyota RAV4 Limited 3.5L Sport Utility 4-Door 4WD Automatic and the process should be similar on the following vehicles:
2006 Toyota RAV4
2007 Toyota RAV4
2008 Toyota RAV4
2009 Toyota RAV4
2010 Toyota RAV4
2011 Toyota RAV4
2012 Toyota RAV4
Tools you will need:
• Phillips Head Screwdriver
• 10mm Socket
• 21mm Socket
• Trim Tool Set
• Pliers
• Ratchet
• Socket Extensions
• Torque Wrench
• Gloves
• Safety Glasses
• Floor Jack
• Jack Stands
• Pick
• Wheel Chocks
Subscribe:
Check out our playlist:
Toyota RAV4 2006-12 3rd Gen:
📱 Download the TRQ Auto Repair App for more videos, torque specifications, and car repair information:
⚠ DISCLAIMER:
While TRQ strives to make the information provided in this video as accurate as possible, it makes no claims, promises, or guarantees about the accuracy, completeness or applicability of the content. No information contained in this video shall create any expressed or implied warranty or guarantee of any particular result. All do-it-yourself projects entail some risk. It is the sole responsibility of the viewer to assume this risk. TRQ is not responsible or liable for any loss damage (including, but not limited to, actual, consequential, or punitive), liability, claim, or any other injury or cause related to or resulting from any information posted in this video.
So the headlight assembly come with the bulbs?
The ones adjusting at the end looked yellow- whats a brighter/whiter bulb for it?
That’s a lot of screws and fasteners!!
This is stupid that you practically have to remove the whole entire front end of the car to just replace headlamps
Comments are closed.
How to Replace Headlight Assemblies 2013-2018 Toyota RAV4
Shop TRQ on 1AAuto.com
Headlight Assembly
Headlight Assembly
Headlight Assembly
Headlight Assembly
Headlight Set
Headlight Set
Shop TRQ on Amazon
Headlight Assembly
Headlight Assembly
Headlight Assembly
Headlight Assembly
This video shows you how to install new headlight assemblies from TRQ on your 2013-2018 Toyota RAV4. Over time, headlight lenses become dull and hazy. You’d be surprised how much that affects your night time visibility! Replacing your headlight assembly is an easy way to improve safety and appearance on your vehicle.
This repair was done on a 2015 Toyota RAV4 LE 2.5L Sport Utility 4-Door AWD Automatic and the process should be similar on the following vehicles:
2013 Toyota RAV4
2014 Toyota RAV4
2015 Toyota RAV4
2016 Toyota RAV4
2017 Toyota RAV4
2018 Toyota RAV4
Tools you will need:
• 10mm Socket
• Trim Tool Set
• Gloves
• Safety Glasses
Subscribe:
Check out our playlist:
Toyota RAV4 2013 – 2018 4th Generation:
📱 Download the TRQ Auto Repair App for more videos, torque specifications, and car repair information:
⚠ DISCLAIMER:
While TRQ strives to make the information provided in this video as accurate as possible, it makes no claims, promises, or guarantees about the accuracy, completeness or applicability of the content. No information contained in this video shall create any expressed or implied warranty or guarantee of any particular result. All do-it-yourself projects entail some risk. It is the sole responsibility of the viewer to assume this risk. TRQ is not responsible or liable for any loss damage (including, but not limited to, actual, consequential, or punitive), liability, claim, or any other injury or cause related to or resulting from any information posted in this video.
You don’t need to take the bumper off. This is way more steps than needed
Very informative and professional video, most certainly will help me do the job. Thank you.
2026
It seems excessive, and you can do it without removing the bumper cover, but this is really much easier.
Comments are closed.
How To Replace Headlights 2006-2012 Toyota Rav4
Shop TRQ on 1AAuto.com
Headlight Set
Shop TRQ on Amazon
Headlight Set
Over time, headlight lenses become dull and hazy. You’d be surprised how much that affects your night time visibility! Replacing your headlight assembly is an easy way to improve safety and appearance on your vehicle. This video shows you how to install new, quality, TRQ headlight assemblies on your 2006-2012 Toyota RAV4.
• Check here for more videos on the 2006-12 Toyota RAV4:
This repair was done on a 2006 Toyota RAV4 Limited 2.4L Sport Utility 4-Door 4WD and the process should be similar on the following vehicles:
2006 Toyota RAV4
2007 Toyota RAV4
2008 Toyota RAV4
2009 Toyota RAV4
2010 Toyota RAV4
2011 Toyota RAV4
2012 Toyota RAV4
Tools you will need:
• Flat Blade Screwdriver
• 10mm Socket
• Trim Tool Set
• Socket Extensions
• Magnet – Extendable
Subscribe:
Check out our playlist:
Toyota RAV4 2006-12 3rd Gen:
📱 Download the TRQ Auto Repair App for more videos, torque specifications, and car repair information:
⚠ DISCLAIMER:
While TRQ strives to make the information provided in this video as accurate as possible, it makes no claims, promises, or guarantees about the accuracy, completeness or applicability of the content. No information contained in this video shall create any expressed or implied warranty or guarantee of any particular result. All do-it-yourself projects entail some risk. It is the sole responsibility of the viewer to assume this risk. TRQ is not responsible or liable for any loss damage (including, but not limited to, actual, consequential, or punitive), liability, claim, or any other injury or cause related to or resulting from any information posted in this video.
So helpful… gonna change myself. However I chnaged my tail light myself ..lol
no need al that, i replace them in 5 min max, both.
Love your work babe, doing it now I’m in Australia, hope you’re country resets at some stage, crazy what’s going on in America stay safe 😢❤👍👍👍👍👍
This is just fabulous
Comments are closed.
2011-2015 V6 Camaro K&N Series 63 AirCharger Cold Air Intake Review & Install
Supercharge Your Car’s Performance. Improve your Camaro’s performance by installing the K&N Series 63 AirCharger Cold Intake system. This cold air intake system is specifically designed to reduce the temperature of the air flowing into your car’s engine, as well as increase that air flow as much as possible. This results in an immediate boost in your Camaro’s horsepower and torque. You’ll easily feel the difference whenever you step on the gas.
No Retuning Required. The K&N Series 63 AirCharger Cold Air Intake is designed to improve the performance of your Camaro without the need for costly aftermarket retuning or recalibrations. Thanks to its top-notch design and fitting, you can immediately enjoy the added power as soon as you install it. However, it is recommended that you get your car re-tuned to truly maximize the benefit of your new air intake system.
Cotton Gauze Clamp-On Air Filter. The included K&N Cotton Gauze Clamp-On Air Filter is engineered to filter out solid air particulates that could choke or damage your engine while keeping air flow efficient. What’s more, it’s easily bigger than any stock Camaro air filter out in the market today. All these qualities ensure that your vehicle has access to the maximum amount of fresh, low-temperature air at all times, resulting in better all-around performance.
Unique and Exclusive Heat Shield. Instead of having a restrictive air box to house the filter, the K&N Series 63 AirCharger Cold Air Intake system features a large heat shield. This allows for the biggest size air filter to be used while ensuring the maximum amount of air flow. The open and unrestricted design of the heat shield also lets you check on the air filter’s condition without having to disassemble anything.
Easy Bolt-On Installation. This K&N Series Cold Air Intake system is carefully made to offer a completely stress-free installation process. This is thanks to its considerate design that reuses your vehicle’s factory mounting points, making the entire setup a breeze to do. What’s more, the entire process requires only basic hand tools—no cutting, drilling, or welding needed.
Covered by a Manufacturer’s Warranty. K&N offers a Million-Mile, or 10-year warranty against defects in material and workmanship on all its intake system offerings. Limitations do apply, so check out the manufacturer’s official website for more information.
Application. This K&N Series 63 AirCharger Cold Air Intake is designed to fit 2011-2015 3.6L Camaro models.
Intro – 0:00
Features – 0:34
Construction – 3:42
Price – 4:23
Install Difficulty – 4:48
Full Install – 5:11
AmericanMuscle.com is your aftermarket Camaro parts authority for 2010-2022 Chevrolet Camros! We have the best price-matching and muscle car customer service experts in the industry!
Anyone have the car pitch a fit, after install? Getting P0102 for the MAF on 2015 2LT.
Conveniently left out the hardest part: getting the air box nuts removed
Hmm bought this and my car doesn’t turn on now put the old one back on and it turns on. Reinstall the k&n filter and took off the filter it started.🤦♂️
Comments are closed.
How to Install a Cold Air Inductions Intake on a 2016–2024 Camaro (3.6L V6)
Unleash the true potential of your V6 Camaro.
In this video, we walk you step-by-step through the installation of the Cold Air Inductions 501-1101-B Cold Air Intake System, designed for the 2016–2024 Chevrolet Camaro 3.6L V6.
This premium aluminum intake replaces the restrictive factory plastic air box with a performance-engineered system that delivers proven horsepower gains — improved throttle response, a deeper induction tone, and an OEM-plus fit and finish that looks as good as it performs.
In this video you’ll learn:
• Tools required for the install
• How to remove the factory air box
• Step-by-step installation of the new CAI system
• Fitment checks and performance overview
Performance Gains:
• Up to +13 Horsepower at the wheels
• Average gains of +11 Rear-Wheel HP (depending on conditions)
What’s Included:
• Insulated Aluminum Air Box
• Air Box Lid with Clear Inspection Window
• Thermal-Coated Intake Tube
• High-Performance Air Filter
• Black Silicone Coupler & Stainless Clamps
I just buy ngk everything, no problems on any car so far.
Do you recommend the 41-110 for a 2001 suburban 1500?
I got a 2006 Silverado 5.3 L33 HO engine what plugs should I run what’s the part number?
Are the 41-110 fine for a 01 Silverado 5.3? Parts guy argued that it’s only for 07 and up.
Just bought some iridium 41-110 acdelco on amazon. They came without electrode protectors. Is that normal or did I buy fakes.
Comments are closed.
Chevy Spark Plug Trick YOU DON'T KNOW THIS! Until now…
Chevy Spark Plug Trick YOU NEVER Knew Until Now! ACDelco Iridium spark plugs give the best performance. Chevy Vortec V8 spark plug truck tips.
Best Chevy truck spark plugs. GM decided to stop recommending these spark plugs, but Matt knows best.
These truck engines can run on Copper, Platinum, or Iridium spark plugs. PARTS BELOW:
Iridium spark plugs and wires work the best for these Vortec V8 trucks.
ACDelco 41-110 is the older design and 41-162 is the latest design. Either plug will work.
DON’T use any other spark plug numbers except for these or else you may damage your engine!
This spark plug trick works for 1999-2007 Chevy Silverado, Tahoe, Avalanche, Suburban, GMC Sierra, and Yukon Denali GMT800 trucks.
Vortec V8 Engines: 4.8, 5.3, 6.0, and 8.1 gasoline engines.
Timestamps:
0:00 Intro
0:18 Iridium Plug Trick
1:13 Parts Store
2:18 Copper & Platinum Plugs
3:19 Iridium Plugs
4:06 Why They Aren’t Recommended
5:04 Engines This Works On
6:41 Spark Plug Length
7:16 Plug Differences
8:38 Plug Wires
9:40 Wire Differences
11:05 Outro
***Disclaimer: Matt’s Shop shall not be responsible or held liable for any property damage, injury, or financial loss, costs, or expenses that may occur from the purchase or use of the products featured in this video and or attempting to duplicate repair procedures. This is for entertainment purposes only. No warranties express or implied.***
As an Amazon Associate I earn from qualifying purchases.
#mechanic #chevy #customerstates #automotive #truck
5 Comments
This trick works well on 1999-2007 Chevy trucks. I only use ACDelco plugs and wires on these trucks.
ACDelco Plug Plugs
Iridium 41-162: https://amzn.to/3UFP5xH
Iridium 41-110: https://amzn.to/3AFuAKA
As an Amazon Associate I earn from qualifying purchases.
Is that the same number for the Chevy Tahoe 2002?
I replaced the spark plugs twice since I got this vehicle, I was told that I had the wrong ones from AutoZone and I had to pay $380 to do the plug replacement cuz I didn’t want to do it in the cold weather, and so how do you know the difference between the iridium and the platinum ones?
Quarter inch ratchet 1/4 inch swivel quarter to 3/8 adapter and a 5/8 spark plug socket that’s how you get it out make the ratchet small like a kid’s toy put everything on the spark plug but the ratchet first and then come back with the ratchet clicking on.heat shield don’t brk 100% of the time all you got to do is give them a twist before you start yanking on them… If dealing with po300 check MAF sensor and all air intake of tubes for leaks and PCV hose and valve for leaks and O2 sensor also check your hood ground strap on the firewall by your master cylinder if it’s missing it will cause random misfires
This video could have been 1 minute or less.
And actually Matt you want to always chat does spark plug gap no matter what because this cuz they say they’re manufacturer the spark plug gap could be wrong
Comments are closed.
How To Change 2014-2018 Silverado Sierra 5.3 6.0 6.2 Spark Plugs (3rd Gen)
The long requested spark plug change video is here! In this video we change the spark plugs on Cliff’s 2014 Silverado with the 5.3L EcoTec3 L83 V8 motor. The process used in this video should be identical to the 6.0L V8 and the V6 Silverado and Sierra Models as well.
This process should be identical for the following vehicles:
2014 – 2018 Chevy Silverado
2014 – 2018 GMC Sierra
And very similar to many other GM trucks like the Tahoe, Suburban, Escalade, and Yukon.
#3rdGenSilverado #3rdGenDIYs #GMTruckMods
👉🏼 LINKS TO PURCHASE TOOLS & PARTS FEATURED BELOW👈🏼
⚠️Try anything shown in this video at your own risk ⚠️
********************************************************************
Tools (Affiliate Links)
********************************************************************
6″ Magnetic Swivel Spark Plug Socket:
(Note: This will not work on spark plug #8 due to size)
3.5″ Magnetic Swivel Spark Plug Socket:
(Note: This one should work for spark plug #8)
Standard Magnetic Spark Plug Socket:
Socket Extensions:
(Note: This kit includes a 1.5″ extension which was the smallest I was able to find online. I removed spark plug #8 with what I believe was a 1″ extension so I am not positive if a 1.5″ extension will work or not.)
Torx Bits:
Milwaukee Cordless Impact 2861-20 M18 Fuel:
🔨 Essential DIY Tools:
***************************************************
🎬 Most Current Recording equipment (Affiliate Links)
***************************************************
📷 Video
Canon R6:
Canon RF 24-70mm F2.8 L is USM Lens:
Canon 80D Camera Body:
Sigma 18-35mm F1.8 Art DC HSM Lens for Canon:
Race clips shot using GoPro:
🔊 Audio:
Lapel Mic:
Zoom ZH1 H1 Handy Portable Digital Recorder:
💡 Lighting:
Genaray Flood Light
Genaray Softbox:
Newer Ultra High Power Video Light:
———-
Thank you to all of our fans and subscribers for supporting us on our journey!
FOLLOW US ON INSTAGRAM: @THESUNDAEDRIVE – www.instagram.com/thesundaedrive
CHECK OUT OUR WEBSITE & BLOG: www.thesundaedrive.com
********************************************************************
👪 Partners and Sponsors
********************************************************************
Tool and Dye Designs – Auto enthusiast inspired clothing:
Website: www.toolanddyedesigns.com
Kies Motorsports – For all your BMW needs
Website: www.kiesmotorsports.com
Youtube: www.youtube.com/kiesmotorsports
Speed Circuit – LS Powered Exocet and Evo Upgrades
Website: www.SpeedCircuit.net
********************************************************************
🎵 Music
********************************************************************
5 Comments
Gap between 0.037–0.043 in. Even with factory plugs, it is a good idea to always verify you have the correct gap
Excellent video help me with my mobile mechanic repair
I’m assuming it’s pretty much the same for the gmc yukan
Does 41-168 supersede 41-114? im being advised by multiple websites that 41-114 is not compatible with my 2016 Silverado LT 5.3. Thanks for your help 🙂
You don’t put no anti-seeds on your spark plugs
Comments are closed.
How to ● change your 2013 – 2018 Toyota Corolla Engine Air Filter
USA ● Engine Air Filter ….
CANADA ● Engine Air Filter ….
Super easy to change the engine air filter on your 2013 to 2018 Toyota Corolla. Definitely a do it yourself job. After you’ve done the engine air filter once, you’ll be able to check or change it easily each year. Here’s a tip: if the engine air filter is dirty, try vacuuming it and then cleaning it in hot soapy water and then letting it dry. You’ll save money on expensive engine air filters and you may get years of life out of one.
Full transparency! I am an Amazon affiliate. A small portion of each sale helps support my channel, which is very much appreciated! Thank you!
Full transparency! I am an Amazon affiliate. A small portion of each sale helps support my channel, which is very much appreciated! Thank you!
Thanks bro
Do you know if I need to top up the ac compressor oil in my 2016 corolla? Is it accessible without removing it?
Thank u for sharing this. You saved me $85 just to have the dealer do it for me.
No tools needed?
Comments are closed.
How to ● change your 2008 – 2013 Toyota Corolla Engine Air Filter
The engine air filter on your 2008 to 2013 Toyota Corolla is so easy to check or change. Definitely a do it yourself job. After you’ve done the engine air filter once, you’ll be able to check or change it easily each year. Here’s a tip: if the engine air filter is dirty, try vacuuming it and then cleaning it in soapy hot water and then letting it dry. You’ll save money on expensive air filters and you may get years of life out of one air filter!
USA
● Engine Air Filter ….
CANADA
● Engine Air Filter ….
or MY STORE
●
●
Full Transparency! A small portion of each sale goes from Amazon’s pocket to my pocket with no additional cost to you! Thanks for your support. It’s very much appreciated!
Great content. I used to blow out air filters and replace it but after a while, I just bought new filters and put in every oil change..
What is the plug at the hose and for what is it
Love how easy they made this!!!! Totally not being sarcastic !!!!!!!
I was having difficulty putting on the cover
After watching this video I followed through especially on the part where u wiggle it
Can’t thank u enough really and thnx 4 this video
Much luv ❤️
Comments are closed.
2014 – 2019 TOYOTA COROLLA 1.8L CABIN & AIR FILTER REPLACEMENT TUTORIAL – 2015 2016 2017 2018 2019
GET THE ( 2014 – 2019 ) TOYOTA COROLLA
REPAIR VIDEO PACK HERE 👇 👇 👇 ( 19.99 )
OVER 40 VIDEOS & 30 PDF FILES, ALL ON HOW TO FIX & MAINTAIN YOUR COROLLA
LEARN MORE ABOUT THE COROLLA REPAIR VIDEO PACK HERE 👇 👇 👇
TOYOTA PART #S
AIR FILTER – 17801-YZZ05
CABIN FILTER – 87139-YZZ82 or 87139-YZZ20
In this video I demonstrate how to replace the cabin filter and the air filter on a 2014 through 2019 Toyota Corolla with a 1.8 L engine. The cabin air filter can have more than one part number so buying a cabin filter ( or an air filter for that matter ) that identifies as either part number is the same one in reality.
#corollacarclub #diyautorepair
Save some money? Small donations help greatly
Paypal.me/GearmoAuto
VENMO- @Gearmo-Auto
CASH APP – $GearmoAuto
I would love to make more content with better quality to help everyone save money and time. Thank you!
Help Support the channel while helping kids learn
they’re ABC’S Purchase This ABC Book HERE!
CHECK OUT MY OTHER CHANNELS HERE
MUSIC MADE BY ME THATS FREE TO USE FOR CREATORS
GAMING / KIDS CHANNEL
BUSINESS / ADVERTISING ?
REACH OUT TO gearmoauto@gmail.com
FOLLOW ME ON INSTAGRAM
UPGRADE TO THE BEST / BRIGHTEST LED BULBS HERE
USE PROMO CODE : GEARMOAUTO
FOR 15 % OFF
ANY KIND OF BULB IS LED !! HEADLIGHTS/ INTERIOR LIGHTS/ TAILLIGHTS / BLINKERS
AUXITO IS THE TOP LED LIGHT COMPANY RIGHT NOW. THEIR LED BULBS LAST LONG AND NEVER FLICKER LIKE ALOT OF THE CHEAPER BRANDS.
Note: Gearmo Auto youtube channel or website is not responsible for any damage or harm caused to a vehicle or persons using the information provided on the channel or website, automotive vehicles and any other instructional videos listed here or the website are for educational or informative purposes only, this information should only be considered by professional automotive technicians or the like that can make decisions based off career based knowledge to either apply or deny this information which still is not the responsibility of the up loader in any case. Automotive vehicles should be repaired at proper professional and safe locations at all times.
Car Stuff:
Bosch icon 26a Wiper:
Bosch icon 16a Wiper:
Perrin Reverse Lockout:
Perrin Radiator Shroud:
Perrin Boost Control Cover:
Perrin Belt Cover:
Perrin Strut Bar:
Perrin Battery Tie Down:
Perrin Brake Master Cylinder Reservoir Cover:
Kartboy Short Shifter:
Kicker speakers:
Kicker tweeters:
Kicker subwoofer:
Idoing headunit:
Carlinkit CarPlay (wireless carplay):
Turbosmart Kompact bpv:
F1 Fog Light:
2015-2017 Front lip:
2018-2020 Front lip:
Side Skirts:
Rear Spats:
Carbon creations diffuser:
Carbon spats:
Carbon Fiber Front Lip:
Carbon Fiber Side Skirts:
Uniden R7:
Uniden DFR7 Radar:
Mirror Mount and Mirror Tap:
Garage Stuff:
Husky Work Bench:
Cabinets (black):
What I use to dry my car:
LED Lighting:
Pressure Washer:
Edifier R1850DB Speakers:
Polk PSW10 Sub:
Wera Screwdriver:
LED Hood Light:
Camera Gear:
Sony ZV1:
Deity Mic:
Cage:
Wide Angle Lens:
5 Comments
I meant 3,500 miles Not 35,000! Made an annotation in the video so there is no confusion.
how do you clean out your oil drain pan after you dump the used oil back inside the red containers ? I was thinking I’d use some dawn dish soap with a soft brush to scrub the soap around with some water but I was curious on how you did it
Did you put oil in the very center hole of the oil filter or just on the metal center ring surrounding the center hole?
Quick tip, I usually just remove three screws from the belly pan and loosen the fourth just to rotate it out of way, no need to remove it completely. This also aids the installation and helps to line up the screws.
I have owned the Ford F150!with Ecoboost for a couple of years.
Do not buy this vehicle. It’s very difficult to change the oil.
There are many other things that you will find that make you wish you never bought one.
Comments are closed.
2018 Ford F-150 oil and filter Change 3.5L ecoboost V6 diy guide 5w30 6 quarts of oil 2015-2021
Product Links:
Oil filter wrench:
Oil Filter:
5w30 Oil:
8mm socket wrench:
New Plastic Drain plug (in case you break it):
Ramps:
Here’s how I change the oil in a 2018 Ford F150 3.5L V6 eco-boost motor it uses 6 quarts of 5W-30 oil and a new filter. The above links are my Amazon Affiliate links, as an Amazon Associate, I earn from qualifying purchases. Thank you for supporting my channel!
When I pulled the drain plug it was like opening a fire hydrant and it emptied in 3 to 5 seconds. Made a huge mess.
I can’t find my filter 2023
Great job
Comments are closed.
2018 Honda Civic Rear Brake Pad and Rotor Replacement With Electronic Parking Brake No Scan Tool
First attempt at editing a video apologies it’s not perfect. Feel free to leave any questions in the comments I’ll get back to you asap.
Tools needed –
Drill with 1/4 in drill bit
Caliper tool
7mm Allen
5mm Allen
Wrachet
Flathead
Hammer
17mm socket or wrench
9mm socket
Brake grease or hi-temp grease
no scan tool needed this is the manual electronic reset process
5 Comments
Thanks for the vid man! Mad help! I didn’t have a question tho, is there a reason you don’t grease the brake pads themselves?
Great video! Had to look up how to do these after I could not work out how the hell to depress the main piston. Would have never considered taking off that electronic break module. Just another reason I infinitely prefer working on old motorcycles to cars lol.
Appreciate this guide you got my sub for sure thanks 👍
So no setting the car into service mode, or messing with a brake reset procedure? Just go in the car after fitting the new pads, pump the pedal until firm, then put the parking brake on/off a few times?
Tip for the countersunk screw, no need to drill, centre punch, hit it on the edge of the screw in an anti clockwise direction. Removes them without drilling.
Why tf is it allen?!?!??! Wtf!?!?!
Comments are closed.
2006-2015 Honda Civic Front Brake Pad Replacement DIY
Here is how to replace the front brake pads on the honda civic.
Torque specs, brake pads, and more info below:
Brake Rotor replacement video:
Brake fluid bleeding video:
2006-2011 civic brake pads:
2012-2015 civic brake pads:
2006-2011 civic OEM brake pads:
2012-2015 civic OEM brake pads:
Brake compressor tool:
Torque wrench:
Silicone paste:
Anti-seize:
Brake cleaner:
Ratchet/socket set:
#ad
Torque specs:
Caliper bolts: 25 ft. lbs
Brake line bolt: 16 ft. lbs
Lug nuts (rims): 80 ft. lbs
8:33 I was genuinely listening to the sound to answer the question then I realized the date of this video and that the question was about the meme lol
Comments are closed.
HONDA CIVIC REAR BRAKES REPLACEMENT – Changing Brake Pads and Rotors on a 2017 Honda Civic. So easy!
In this video I film my buddy change rear brake pads and rotors on a 2017 Honda Civic. Rear brake replacement on a Honda Civic is really easy. Do it yourself and save money!
Also CHECK THIS OUT
NOTE: My buddy really rushed this job. So here are a few things that I forgot to film and you should do. 1) Clean and grease the slide pins / caliper bolts before reinstalling them. Those are the are the ones you took off using the 7mm Hex Socket. 2) Sand down, clean and grease the hub before you install the new rotors. 3) Sand down, clean and grease the caliper where the brake pads get installed.
I hope this video helped you. Please don’t forget to LIKE and SUBSCRIBE. Thanks for Watching!
Get FREE unlimited Shipping, Movies and more –
Click on the Links below to Purchase:
*Honda Civic Rear Brake Pads and Rotors –
*Honda Civic Power Stop Rear Brake Kit –
*Brake Parts Cleaner –
*Disc Brake Caliper Piston Compression Tool –
*Brake Parts Lubricant –
*Floor Jack –
*Jack Stands –
*Nitrile Disposable Gloves –
*Craftsman 3 pc Ratchet Set –
*Dewalt Impact Wrench 1/2 inch –
*Craftsman Screwdriver Set –
*Craftsman 1/2 inch Drive Ratchet –
*Craftsman 1/2 inch Drive Metric Deep Sockets –
*Craftsman Mechanics Tool Set –
*Craftsman 3/8 inch Hex Bit Socket Set –
*Craftsman Torque Wrench 1/2 inch –
*Hammer –
*Sledge Hammer –
*Dewalt Cordless Drill –
*Dewalt Drill Bit Set –
*Gojo Hand Cleaner –
*Shop Towels –
*Fixin To T-shirt –
*Car Guy T-shirt –
*Honda T-Shirt –
*Honda Long Sleeve T-Shirt –
*Honda Hat –
* Fixin It is an Amazon Associate and earns from Qualifying Purchases.
Disclaimer:
Due to factors beyond the control of Fixin It, I cannot guarantee against improper use or unauthorized modifications of this information. Fixin It assumes no liability for property damage or injury incurred as a result of any of the information contained in this video. Use this information at your own risk. Fixin It recommends safe practices when working on vehicles and or with tools seen or implied in this video. Due to factors beyond the control of Fixin It, no information contained in this video shall create any expressed or implied warranty or guarantee of any particular result. Any injury, damage, or loss that may result from improper use of these tools, equipment, or from the information contained in this video is the sole responsibility of the user and not Fixin It.
1 Comment
5 Comments
Hi Everyone, Thanks for Watching and Subscribing. It really means a lot.
Please check out my new channel called “Traveling It”. 🌎 ✈. Travel with me to breathtaking destinations, get travel tips and more. Have a Great Day! 😎 https://youtube.com/@travelingit?si=Xx0QcY6YUicZ9NM1
Thanks for this video. I am a lazy weekend diy mechanic only. I use a bi directional obd tool for ebp reset. The rotor screw that keeps on stripping is not a Philips head but a JIS ( Japanese Industry Standard). Who knew?
You should change your name to breaking it because that’s what everyone’s gonna do following your video😂
Watching you just pop off thr dust caps with ease makes me want to burn my mother fucking car to the ground. Fuck this shit.
To remove rotors spray KROIL on the screws, let stand for 10 minutes, then use an impact screwdriver
Comments are closed.
Electric Vehicle Chargers Explained | EV Basics
Everything you need to know about EV chargers! There are several ways you can juice up your electric vehicle. We’ll cover the three main charging speeds: Level 1, Level 2, Level 3 or DC Fast Charging, plus a bonus wireless charging technology that’s an up-and-coming game changer. We’ll also detail all the connectors you may encounter: Tesla, J Plug, CCS, and CHAdeMO.
EV Basics is Powered by WiTricity. Learn more about wireless EV charging at
🔌 Check out our recommendations for the best home EV chargers:
🏆 Best Overall Charger: JuiceBox 40 – (affiliate)
🏷️ Best Value Charger: Emporia EV – (affiliate)
🔗 Full List w/ Reviews:
👏 Join this channel to get access to perks:
📚 Get More EV Basics:
The Difference Between kW and kWh:
0:00 Introduction
1:08 Level 1 Charging
2:38 Level 2 Charging
4:59 Level 3/DC Fast Charging
6:58 Magnetic Resonance Charging
8:30 J1772 Plug
8:49 CCS Plug
9:09 CHAdeMO Plug
9:37 Tesla Plug
10:14 Adapters for Tesla Chargers
10:45 Conclusion
We mention a few adapters to make your Tesla more compatible with other charging systems. If you’re interested in purchasing any one of them for your Model 3, Model Y, Model X or Model S, check them out below.
🔌 Connect your non-Tesla to a Tesla level 2 charger so you can charge at Tesla destination chargers or a friend’s house that only has Tesla chargers:
🔌 Connect your newer Tesla to a CCS fast charger, like at Electrify America or EVGo, to be able to charge if you can’t find a Supercharger or aren’t near one:
🔌 Looking for an EVSE to install at home? We have a complete guide to what we like the best:
Note: By clicking on one of the above links and making a purchase, EV Pulse might receive a small commission.
For the latest news from the electric vehicle frontier visit EV Pulse (
EV Pulse has all the information you need to master Electric Vehicles! How do you reduce range anxiety? Should you keep your car constantly charged? All of those questions and more are ones we want to help you answer, so you can be an expert when it comes to EVs.
Follow EV Pulse on Social:
Facebook:
Instagram:
Twitter:
TikTok:
#EV #EVBasics #EVs101 #EVPulse tesla to ccs adapter tesla adapter tesla to j1772 adapter
5 Comments
We talk about the CCS to Tesla adapter you can now get for your Tesla charger, but Tesla also sells a CHAdeMO to Tesla adapter, too. We don’t recommend that adapter as CHAdeMO charging stations are much more difficult to find than CCS, unless you need to be able to charge at non-Tesla fast charging stations and your car doesn’t support the CCS adapter. Does your Tesla support the CCS adapter? Tesla’s website can answer that –> https://shop.tesla.com/product/ccs-combo-1-adapter?web=true
Big swing and a miss on the level 1 take. Kind of perpetuating range and charging speed anxiety while not actually doing the math to see if it’s viable. The average person in the US travels 37 miles a day. at 4 mi/hr charging speed you only need to be able to charge for 10 hours a day to achieve that daily range with level 1… For most people level 1 works just fine. “Slow” doesn’t mean bad.
This video is out of date now. Just so you know.
Great work on this video.
The negativity around Level 1 charging is ridiculous. If you’re able charge for 10 hours you’re adding at least 30 miles of range, which is really all most people need most days.
Comments are closed.
Beginner's Guide to EV Charging
EV Charging is probably the most confusing part of EV ownership – and even after owning my long range Model 3 for over a year and a half, and driving 20,000 miles, there are still some things that trip me up with it.
There’s different power levels, different plugs, different looking stations, and all of that is really confusing if you’re coming from a gas vehicle where everything is pretty standard.
So if you are a new owner or looking at switching to an EV, this video should help you out a bit. This isn’t going to be an in-depth technical video either, but if you finish watching this and want some more details about how charging works, let me know and I’ll make that happen.
Use my referral link to receive 1,000 free Supercharger miles with the purchase and delivery of a new Tesla car, or earn a $100 award after system activation by purchasing or subscribing to solar panels:
My Car Insurance:
–Chapters–
0:00 Intro
0:33 What charges a car?
1:09 The Power Levels of Charging
1:39 Level 1 Charging
2:22 Level 2 Charging
3:20 Level 3 (DCFC) Charging
6:33 Charging Plug Types
6:50 J Plug (SAE J1772)
7:19 CCS (Combined Charging System)
7:38 CHAdeMO
7:59 Tesla
8:26 My Thoughts on Charging
9:20 Optiwatt Ad Break
10:07 Outro
–My Tesla accessories–
Jeda Products (Wireless Pad, Hub, SSD, Tray):
Portable SSD for Sentry/Dashcam Storage:
Portable Level 2 Charger:
Microfiber Screen Cleaner:
Door Handle Wraps:
Center Console Wrap:
Aero Wheel Center Covers:
Rubber License Plate Frame:
Get 10% off at TESBROS:
Get $10 off a purchase of $150 with promo code “sibs” at ForMyTesla.com
Get a Tesla subscription box from TESBOX here:
–My Camera Gear–
Canon EOS Rebel SL2:
Rode VideoMic
Rode Wireless GO II:
58mm Circular Polarizer:
Fat Gecko Dual Suction Mount:
Disclaimer: These are referral links and I may receive a percentage of profits from products sold.
#Charging #EV #ElectricCars
Music from Punch Deck:
—FOLLOW ME ON SOCIAL MEDIA—
Twitter:
Facebook:
Instagram:
TikTok:
5 Comments
Thank you. Looking to buy my first EV and easy to watch videos that are straight to the point are great to help me know what I’m in for. Appreciate you.
Thanks
Just bought a new 2025 Toyota bz4X Nightshade AWD (Which drives great!). I definitely enjoyed your video.
Regards,
John Avila
I want to get my girlfriend a plug in Prius. We are saving up for one but as usual with our having had 7 Priusess, 3 destroyed by bad drivers, 2 died, and one we bought would not start and we returned it.
Probably a 2012 but who knows what we might get.
Kathy doesn’t always get what I tell her about cars and she wants to drive all over so I must find out everything I can.
How far do you live from Pittsburgh and how long does it take you to drive there ?
My family lives there and I am originally from Pittsburgh & I am The Guy From Pittsburgh ( not my imposter that YT refuses to remove in violation of their own rules ) on YT.
So far I can”t find anything on how much it costs to charge a Prius.
We are both disabled and on SSI so we cannot afford a new Prius but we loved our cars.
Thanks for this video and I subscribed.
Thanks for the helpful and straightforward information! I picked up my new 2025 Chevy Equinox EV a week ago, and it’s time to charge it. My home charger won’t be installed until next week, so I’ll be exploring charge locations today. This video gave me the information I need–
So …why would u need a home charger installed of the plug in will get the job done ? I was going to but now feel like I don’t need one.
Comments are closed.
Electrical Vehicle Chargers Explained | Ask This Old House
In this video, This Old House master electrician Heath Eastman teaches host Kevin O’Connor everything he (or anyone else) needs to know about choosing an electric vehicle charger for their home.
SUBSCRIBE to This Old House:
Master electrician Heath Eastman teaches host Kevin O’Connor all about the different types of electric vehicle chargers. Heath explains Level 1, 2, and 3 chargers, how they work, and who they’re suited for. He even goes over some of the installation requirements for each type of charger, and how many miles of charging the owner can expect. He even puts to rest some safety concerns on the topic.
Electric Vehicles Need Chargers
Electric vehicles run on power stored in their batteries. As they drive the power depletes, and most vehicle owners use overnight charging to boost their stores. To do so, they use an electric vehicle charger which plugs into the vehicle and transfers power from the energy grid to the vehicle. By morning, the owner unplugs the vehicle, wraps the cord, and goes about their day.
There are Different Types of Chargers
There are three types of vehicle chargers; Level 1, Level 2, and Level 3. Level 1 and Level 2 are the most common for homeowners, while Level 3 are the rapid charging models found at gas stations, shopping centers, and other public places.
Level 1 Chargers
Level 1 electrical vehicle chargers plug into a standard 120-volt outlet in a home or garage, and then stretch to the vehicle’s charging port. These chargers typically come with the vehicle and can boost the battery life up to 2 to 3 miles per hour of charge.
For folks who only drive locally, this may be all they need, as overnight charging could yield around 20 to 30 miles of charging. For folks who have longer commutes, these chargers are insufficient, though they should keep one in their vehicle at all times.
Level 2 Chargers
Level 2 chargers are much heavier duty. These chargers require 240-volt electricity on a 50-amp circuit, similar to an electric stove or dryer. An electrician will have to come to the home, assess whether the panel needs to be upgraded or not, and install the wall-mounted charger.
Level 2 chargers are capable of charging a vehicle around 25 to 30 miles per hour of charging time. These chargers are the most common home-based charging stations as they can typically fill an electric vehicle’s battery stores completely overnight.
Most Level 2 Installations Require a Panel Upgrade
Before bringing an electric vehicle home, have an electrician assess the home’s panel to determine whether it can handle a Level 2 charger. One-hundred-amp panels with all gas appliances may be okay, but in most cases, anything less than a 200-amp panel requires a service upgrade—an additional cost the homeowners need to consider.
Where to find it?
Heath and Kevin breakdown the basics of EV Chargers and the different levels of chargers available to electric car owners.
Heath explains that there are 3 levels of chargers available, however level 1 and level 2 are the main options available to the average homeowner. Heath then breaks down each levels necessity and benefits. Then Heath explains where these EV Chargers should be located and how they work. He explains the common locations such as inside garages, but outdoor locations can be just as safe. He also explains the proper installation and requirements for an EV Charger port. Kevin gets clarifications on how often one should charge their car, and when it’s necessary to upgrade ones service from 100 to 200 amps.
Looking for more step by step guidance on how to complete projects around the house? Join This Old House Insider to stream over 1,000 episodes commercial-free:
Plus, download our FREE app for full-episode streaming to your connected TV, phone or tablet:
About Ask This Old House TV:
From the makers of This Old House, America’s first and most trusted home improvement show, Ask This Old House answers the steady stream of home improvement questions asked by viewers across the United States. Covering topics from landscaping to electrical to HVAC and plumbing to painting and more. Ask This Old House features the experts from This Old House, including general contractor Tom Silva, plumbing and heating expert Richard Trethewey, landscape contractor Jenn Nawada, master carpenter Norm Abram, and host Kevin O’Connor. ASK This Old House helps you protect and preserve your greatest investment—your home.
Follow This Old House:
Facebook:
Twitter:
Pinterest:
Instagram:
Electrical Vehicle Chargers Explained | Ask This Old House
5 Comments
This gave me a new perspective.
Very practical and helpful.
At 30 miles/hour of charging, an overnight charge for, say, ten hours gets you 300 miles. Doesn’t make sense, then, to have an EV with well over 300 miles range if you can’t charge faster.
Not the expert. At all. I’m going based on owning an Anker f3800
The 110 outlet is going to get you max 1800 watts per hour.
Since your battery is let’s just say… 50,000-100,000 watts. (So, 50, 100kw)
After ten hours. You’re getting 18,000 watts. (18k)
Now my Anker. It can export 6000 watts. (The difference is 1.8k from a wall. Or 6k from my Anker. Or… you’re 240v port)
After ten hours of charging. That’s 18kw. Vs 60kw.
Again that’s me using Anker f3800 as a reference. So an actual 240v outlet, especially if running on a 50amp (not a 30amp like the Anker) it might get 12,000 w (12kw). Power like that can fill a massive battery in 10 hours.
Again. Thats me thinking of it as an Anker. So maybe the fast charger is even faster than that.
Highly disappointed you said dryer outlet. EVs require a heavy duty outlet made for long duty cycles. A “dryer” outlet can fail or create injury.
Comments are closed.
Brake Myth: What Causes Rotors to Warp | PowerStop x @FayeHadley #powerstop
When you hear someone mention that their rotors feel “warped”, they likely are experiencing either DTV or excessive lateral runout.
The term “warped rotors” can be misleading because this catch-all term may actually be caused by several different issues. While brake rotors can in rare cases become physically bent, this is much less common than the term “warped” might lead you to believe.
Learn more about DTV and lateral runout in @FayeHadley’s full Brake Myths video on her channel.
Faye explains everything you ever needed to know about warped rotors in her full-length video. If you’ve ever been curious as to why rotors “warp”, you’ll want to check this out!
I’d rather crash my car than listen another single second of your mental illness displayed on camera..
😂😂😂if YOU told me this id walk away😂 What load of crap is this.
DTV is a made up term for this crap video 😂
And despite the delivery of this crap video its not aids and your not gna die and its not a frikn infomercial.
If your rotors have lateral movement,you have waaayyy bigger problems that warped rotors.
What causes warped rotors???? Certainly not doing 100mph and smashin brakes when the light turns red creating massive ammounts of heat,then proceed to sit there with foot still smashed on the pedal at a conplete stop for those 2 to 5 mins😂😂😂😂😂
Definitly not this
Excuse while i go watch the rest of this fukwads videos😂😂😂😂
I’m here because my year old power stop rotors are already warped. SMH
Comments are closed.
Warped Rotors??? Here's Whats Happening and How To Prevent it! – RyGuys Garage How To
If your vehicle has warped rotors like my wife’s Grand Cherokee did, here’s what’s happening and how to prevent it in the future. ALWAYS do these steps when servicing your brakes or rotors and you’ll never have issues and save yourself a lot of money down the road
5 Comments
They make caliper hanging hooks, use them!!!
Never knew this theres sm misinformation even mechanics i talked to never made this a point! Great video
Wonderful video. Thanks !
I don’t agree completely with the premise. I agree if you don’t lubricate the guide pins or in general the sliding portion of your calipers all kinds of the negative affects occur. I think there is something more to warpage though, in general I think it has to do with over heating the metal and the steel releases tension and warps. Now anecdotally I never had an issue with warpage while I used semi metallic pads, but with certain ceramic pads, the 1st hard stop, rotors are warped.
Great explanation. Thank you!!
Comments are closed.
The Symptoms Of Warped Brake Rotor Explained.
Symptoms of warped brake rotors. Brake rotors are an important part of a vehicle’s braking system that, when warped or malfunctioning, it can seriously reduce the efficiency of the braking system. Warped brake rotors typically cause several symptoms: pulsating brake pedal, vibrating steering wheel, brake noise, and brake pad failure. We often get asked about it and how to check if they’re bad. This video will show you how to identify if you likely have warped brake rotors or symptoms that require a further inspection. It is recommended that you do have your vehicles brakes and front end completely inspected when experiencing shaking or vibrations from the vehicle. We are happy to help you with this further.
5 Comments
I am confused because I am looking for rotors to get for my car and people say that they’ve received “warped rotors” out of the box. Is this something that happens often? I don’t feel any symptoms of worn rotors but they’re very rusty and I haven’t had my brakes serviced in five years and no issues but I was told I need new pads and rotors. Maybe I can just have mine machines if I am happy with them? Ahhh help a lady out! Haha
Definitely got a follow from me, currently have this issue, changing my rotors and pads today, myself, but you definitely explained it very well and I have the symptoms that I couldn’t explain😭
Don’t see the point in machining warped rotary . they just end up warping again for obvious reasons
Nice video, but even 6years ago, machinning the discs…. Just buy new discs, dont cheap out on brakes.
Fantastic description ,awsome help,thankyou😊😊
Comments are closed.
DIY Injector Cleaning in 30 Seconds. How to Test & Clean Fuel Injectors at Home
I make a special tool to soak and unblock a stuck Fuel Injector on my Mitsubishi Lancer Evo 6 TME with the Ralliart special sticker pack. Its a 2000 model JDM Evolution Tommi Makinen Edition which has been sitting too long after restoration. I made a special tool to fix it with stuff I had laying around in my home workshop. There is a detailed Fuel Injector Troubleshooting video on my channel and I show more details about making this injector cleaner too. Comment and let me know what you think!
You should always back flush it first then spray it forward
Do you need to program injectors it you clean them or put new ones
This gave me another task to add on the yearly tune up list, I do on my car.
I did similar but removed the fuel pump relay, removed the fuel hose to the rail and plugged a hose connected to carby cleaner spray. Started the engine the car ran on carby cleaner for a minute before it struggles turned it off. Put everything back and done
Comments are closed.
replace or clean clogged fuel injectors?
Blake shows me how to clean fuel injectors on his camper bus.
5 Comments
Great thnx
You’ll never buy an injector again??… So what happens when the solenoid itself is bad?
Dodge durango?
Real one
2 Esdras 7:75
I answered and said, “If I have found favor in thy sight, O Lord, show this also to thy servant: whether after death, as soon as every one of us yields up his soul, we shall be kept in rest until those times come when thou wilt renew the creation, or whether we shall be tormented at once?” 76 He answered me and said, “I will show you that also, but do not be associated with those who have shown scorn, nor number yourself among those who are tormented. 77 For you have a treasure of works laid up with the Most High; but it will not be shown to you until the last times.
78 Now, concerning death, the teaching is: When the decisive decree has gone forth from the Most High that a man shall die, as the spirit leaves the body to return again to him who gave it, first of all it adores the glory of the Most High. 79 And if it is one of those who have shown scorn and have not kept the way of the Most High, and who have despised his law, and who have hated those who fear the Most High — 80 such spirits shall not enter into habitations, but shall immediately wander about in torments, ever grieving and sad, in seven ways.
81 The first way, because they have scorned the law of the Most High. 82 The second way, because they cannot now make a good repentance that they may live. 83 The third way, they shall see the reward laid up for those who have trusted the covenants of the Most High. 84 The fourth way, they shall consider the torment laid up for themselves in the last days. 85 The fifth way, they shall see how the habitations of the others are guarded by angels in profound quiet. 86 The sixth way, they shall see how some of them will pass over into torments. 87 The seventh way, which is worse than all the ways that have been mentioned, because they shall utterly waste away in confusion and be consumed with shame, and shall wither with fear at seeing the glory of the Most High before whom they sinned while they were alive, and before whom they are to be judged in the last times.
88 “Now this is the order of those who have kept the ways of the Most High, when they shall be separated from their mortal body. 89 During the time that they lived in it, they laboriously served the Most High, and withstood danger every hour, that they might keep the law of the Lawgiver perfectly. 90 Therefore this is the teaching concerning them: 91 First of all, they shall see with great joy the glory of him who receives them, for they shall have rest in seven orders.
92 The first order, because they have striven with great effort to overcome the evil thought which was formed with them, that it might not lead them astray from life into death. 93 The second order, because they see the perplexity in which the souls of the unrighteous wander, and the punishment that awaits them. 94 The third order, they see the witness which he who formed them bears concerning them, that while they were alive they kept the law which was given them in trust. 95 The fourth order, they understand the rest which they now enjoy, being gathered into their chambers and guarded by angels in profound quiet, and the glory which awaits them in the last days. 96 The fifth order, they rejoice that they have now escaped what is corruptible, and shall inherit what is to come;
and besides they see the straits and toil from which they have been delivered, and the spacious liberty which they are to receive and enjoy in immortality. 97 The sixth order, when it is shown to them how their face is to shine like the sun, and how they are to be made like the light of the stars, being incorruptible from then on. 98 The seventh order, which is greater than all that have been mentioned, because they shall rejoice with boldness, and shall be confident without confusion, and shall be glad without fear, for they hasten to behold the face of him whom they served in life and from whom they are to receive their reward when glorified.
99 This is the order of the souls of the righteous, as henceforth is announced; and the aforesaid are the ways of torment which those who would not give heed shall suffer hereafter.” 100 I answered and said, “Will time therefore be given to the souls, after they have been separated from the bodies, to see what you have described to me?” 101 He said to me, “They shall have freedom for seven days, so that during these seven days they may see the things of which you have been told, and afterwards they shall be gathered in their habitations.”
102 I answered and said, “If I have found favor in thy sight, show further to me, thy servant, whether on the day of judgment the righteous will be able to intercede for the unrighteous or to entreat the Most High for them, 103 fathers for sons or sons for parents, brothers for brothers, relatives for their kinsmen, or friends for those who are most dear.” 104 He answered me and said, “Since you have found favor in my sight, I will show you this also. The day of judgment is decisive and displays to all the seal of truth. Just as now a father does not send his son, or a son his father, or a master his servant, or a friend his dearest friend, to be ill or sleep or eat or be healed in his stead, 105 so no one shall ever pray for another on that day, neither shall any one lay a burden on another; for then every one shall bear his own righteousness and unrighteousness.” …..2 Esdras 7:75
///////////////////
Comments are closed.
Should You Do an Induction Service or Injector Cleaning? SCAM or LEGIT?
A Toyota Master Diagnostic Technician discusses Induction service and Injector cleaning service. Is it a SCAM or is it LEGIT and when you should and shouldn’t do it.
In this video we’re covering a dealership’s favorite. The Induction service! Many folks go to the dealership and pay a lot for this service and most of them have no idea if it’s a legit service or they’ve just gotten ripped off so in this video we will cover that.
We’ll take a look at a Toyota Camry that the owner wanted an induction service but in the engine We’ve decided not to do it because it was not needed as you’ll see in this video
Link to Sealed Transmission Fluid Replacement Video :
Link to The 2AR-FE Engine Rebuild Video:
Link to Teslong Camera purchase
*as an Amazon associate, I earn from qualifying purchases.
Check out the second channel :
Recommended Tools:
Basic Scan Tool
Very good DIY Scan Tool
Advanced Scan tool
Spill Free Coolant Replacement Funnel
Sun roof drain cleaning tool
Good DIY Torque Wrench 1/2″
Wireless Apple CarPlay for ToyotaLexus
Very Good Triple Camera Borescope
*as an Amazon associate, I earn from qualifying purchases.
Follow the channel on Social Media :
Check out the channel Merch store
Support the channel on Patreon:
Make a one time donation to the channel:
Check out the amazon store:
*as an Amazon associate, I earn from qualifying purchases.
#thecarcarenut #carrepair #caradvice
0:00 Intro
1:26 Scam or Legit?
3:39 When you Need one and When you Don’t
6:16 Combustion Chamber Inspection
14:52 What about Direct Injected Cars?
5 Comments
40,000 miles, practically nothing? What about high mileage vehicles like 170000 kilometers?
You need to go into the intake manifold to see the valves from the top.
Bummer. I am unfamiliar with the induction cleaning process and it would have been interesting to watch and see the results even on an engine that doesn’t really need it
Check out a few videos about Top Tier (TM) gasoline. It has significantly more detergent than the minimum required by industry standards. In the case of fuel, the detergent is typically some nitrogen based chemical such as polyether amine. This is essentially Techron fuel additive. High detergent fuel gradually cleans the induction system as you drive and keeps it clean. This is particularly important on gasoline direct injection engines to keep the intake valves clean. There is a website that locates Top Tier stations in your area. The cost of the fuel is sometimes the same, or only a few pennies per gallon more than the cheapest fuel. Combine that with Valvoline Restore & Protect engine oil every 5000 miles to remove sludge inside the engine which is vitally important in engines prone to sticking oil rings, and your engine will last much longer with only routine maintenance.
Yeah some technicians, consider it a “wallet flush” if the vehicle is running perfectly fine. Take my money 💰 💰💰💰💰💰💰💰💰
Comments are closed.
serpentine belt replacement
serpentine belt replacement
#belt#change#serpentinebelt #tips #tensioner#belt#noise
5 Comments
That’s it?
If I could give 10 thumbs down I would.
That is indeed a belt
Just look at it lmao it’s so damn beautiful 😂 couldn’t show us how it came off tho
Super
Comments are closed.
How to Replace a Serpentine Belt
Worn out serpentine belt that needs to be replaced? In this video, Ronnie will take you step-by-step through everything you need and need to know to do the job yourself.
What You’ll Need:
– Duralast Serpentine Belt
– Serpentine Belt Loan-A-Tool
– Monkey Grip Clear Safety Glasses
– Duralast Screwdriver
– Duralast #8ml Wrench
Website:
Twitter:
Instagram:
Facebook:
Make sure vehicle is properly secured before performing any automotive work. Wear safety gear as recommended. These videos are intended as an instructional guide for repair. You may encounter slightly different situations with any individual vehicle. Always capture and dispose of or recycle toxic chemicals properly.
5 Comments
ver nice info …..
2011 dodge callber
Quite possibly the worst how to video I’ve ever seen on YouTube.
No positive first then negative
Nice! I was just charged $190 to put one in
Comments are closed.
How to Replace a Serpentine Belt
How to replace a serpentine belt on a VW Tiguan or any 2.0t CCTA/CBFA Volkswagen engine. The Audi 2.0t will be a similar process. This is a step by step DIY showing exactly how to remove and install a serpentine belt. If your serpentine belt is noisy, has a squeal, or is simply worn out, it may be time to replace it. Thanks to eBay Motors for helping me bring this DIY to you.
Serpentine belt ~
eBay’s Virtual Tech ~
How to check a Serpentine belt ~
How to install a Catch Can ~
Humble Mechanic Podcasts
Project White Wookie ~ MK3 GTI Videos
Failed VW parts videos
Tool and Product Reviews
How To videos
MK1 VR6 Swap Videos
Be sure to follow me at:
The Blog
INSTAGRAM
FACEBOOK
TWITTER
5 Comments
Thanks for watching. This is for real a DIY anyone can do! Happy DIYing
Watching this so I can help my dad tomorrow
Good video
Is the serpentine belt the same as a timing belt? And at what miles do you change it?
❤😂❤
Comments are closed.
SYMPTOMS OF A BAD STARTER
In this video, you will learn 5 symptoms of a bad starter. Watching this video will help you diagnose to see if it is time to replace your bad starter. You will also learn how the starter works. This video also teaches you where the starter is located. You might be experiencing no crank/no start, one-click sound, slow crank, starter running but not the engine, and hearing a grinding noise while cranking.
Thank you for watching!
OBD2 Scanner:
▶︎ Car repair manual:
(Get 25% off a 1-month plan using code EASY1MONTH)
Items you might be interested in
Diagnostics
• 12V Battery Tester –
• Multimeter –
Tool Kit
• Tool Set –
Maintenance
• Headlight Restoration Kit –
Emergency
• Amp Jump Starter –
#STARTER #STARTERSYMPTOMS #BADSTARTER
Search terms and questions you might be thinking related to a bad starter are:
What are the symptoms of a bad starter?
What are the symptoms of a starter?
What are the symptoms of a failing starter?
What does a bad starter do?
Why does my car have a check engine light on?
Where is the starter located in the car?
How does a starter work?
What is the purpose of a starter?
Symptoms of a bad starter
signs of a bad starter
starter symptoms
how to diagnose a bad starter?
starter
engine oil light on
⚠ DISCLAIMER: Any information provided in this video is intended to educate the viewer on how to repair cars. EasyAutoFix shall not be liable under any circumstances in case of any injury, damage, or any other accident that may occur. By watching this video, you agree to comply with the disclaimer. EasyAutoFix earns from qualifying purchases as an Amazon associate.
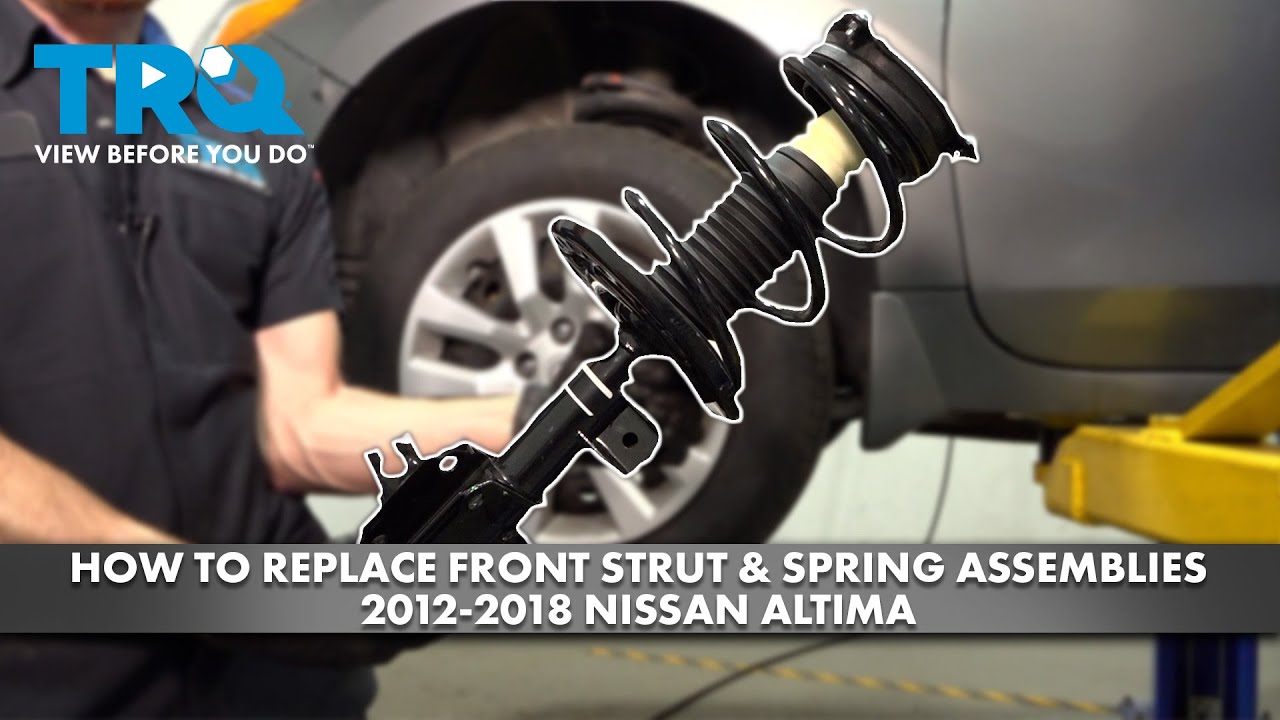
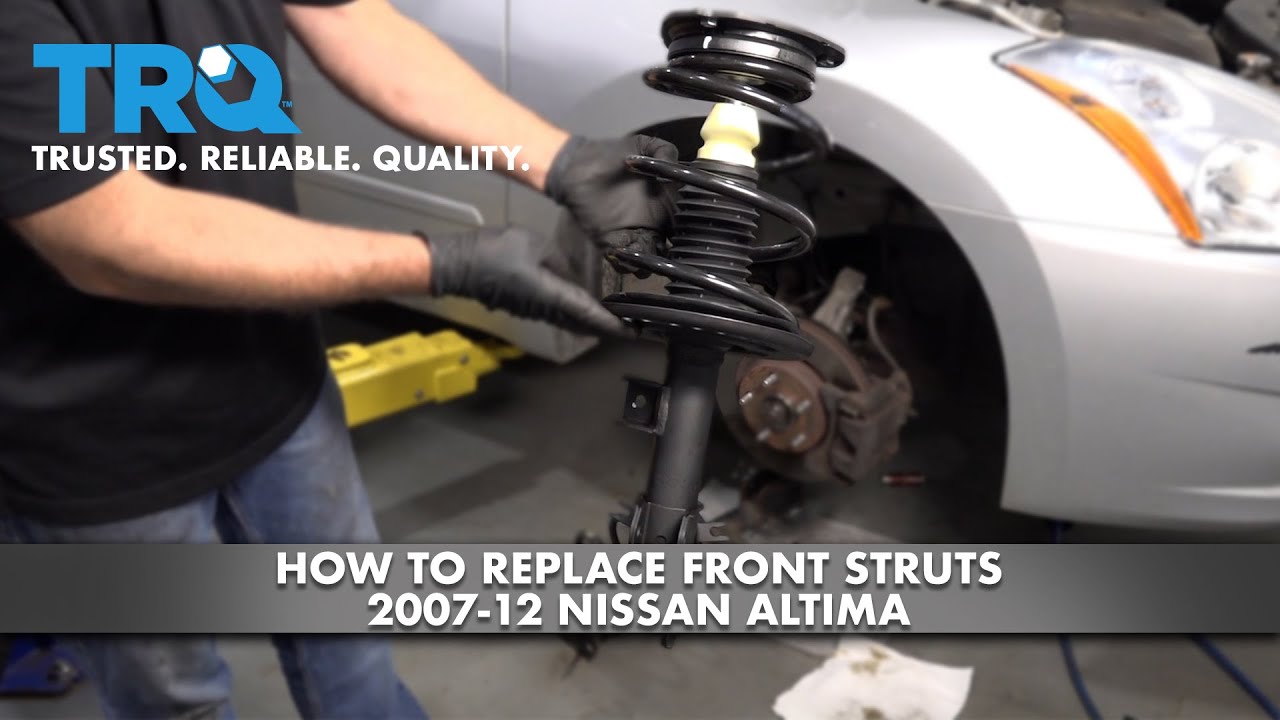


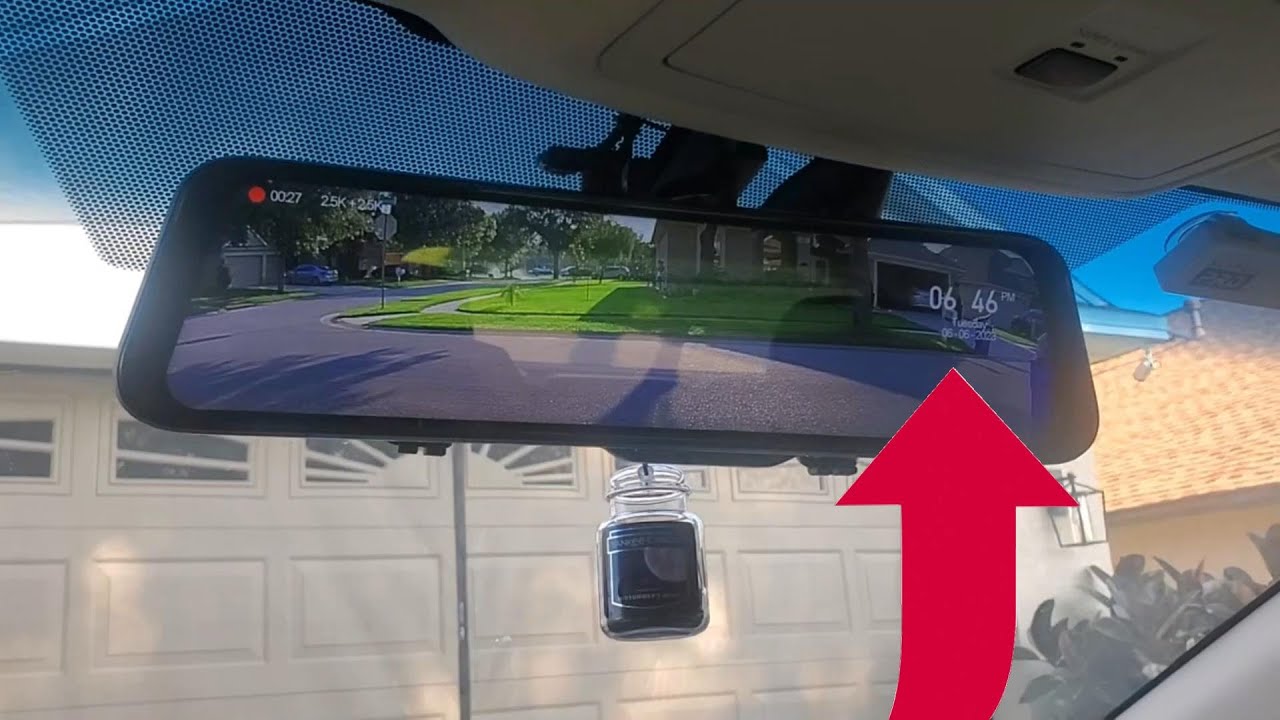


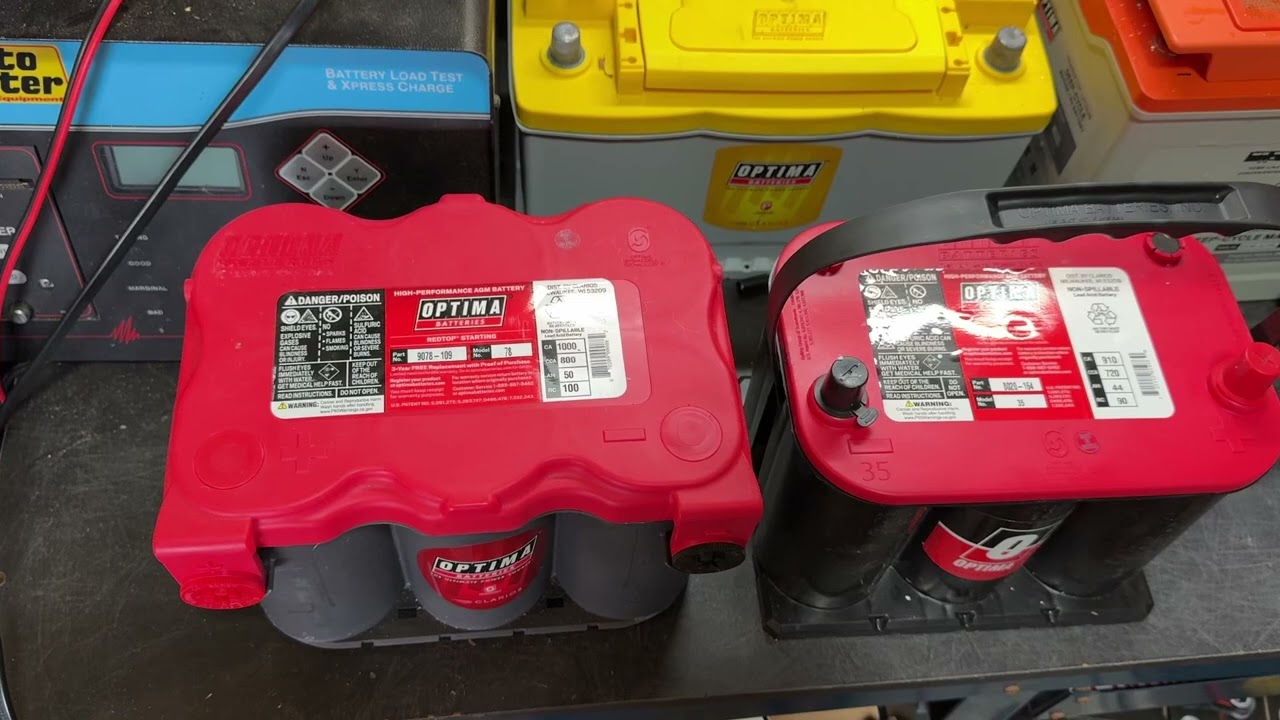
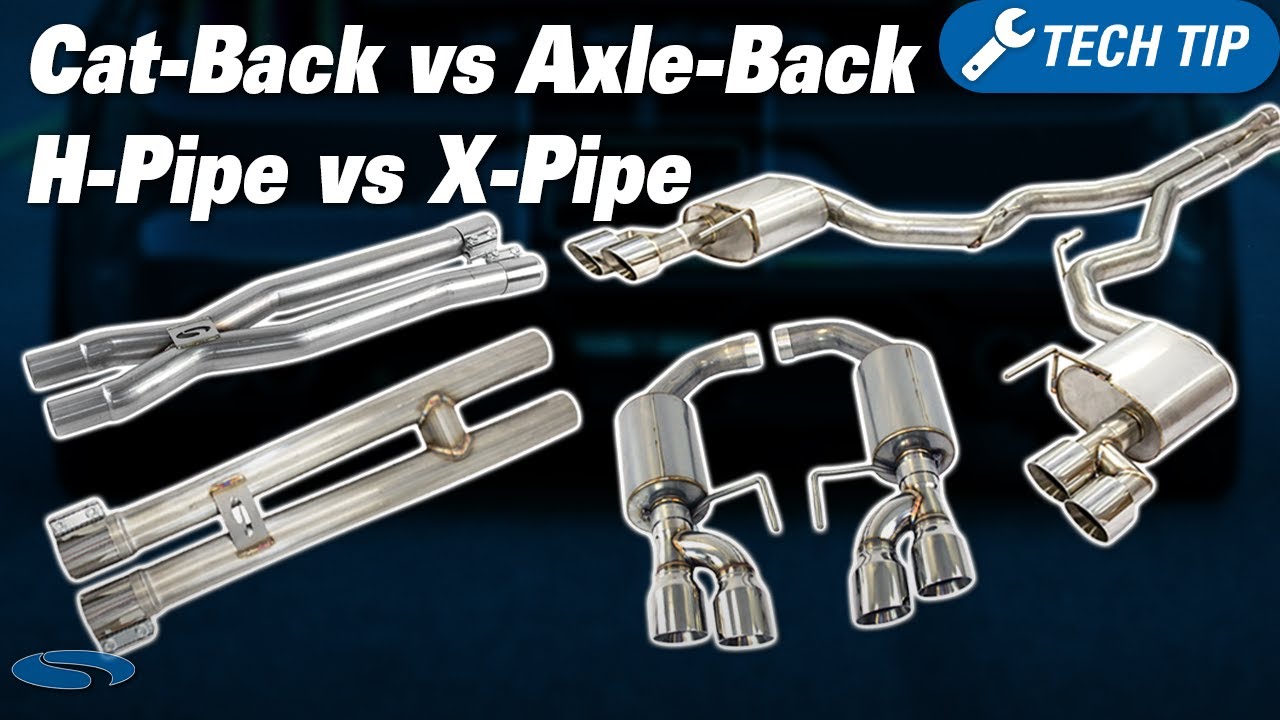
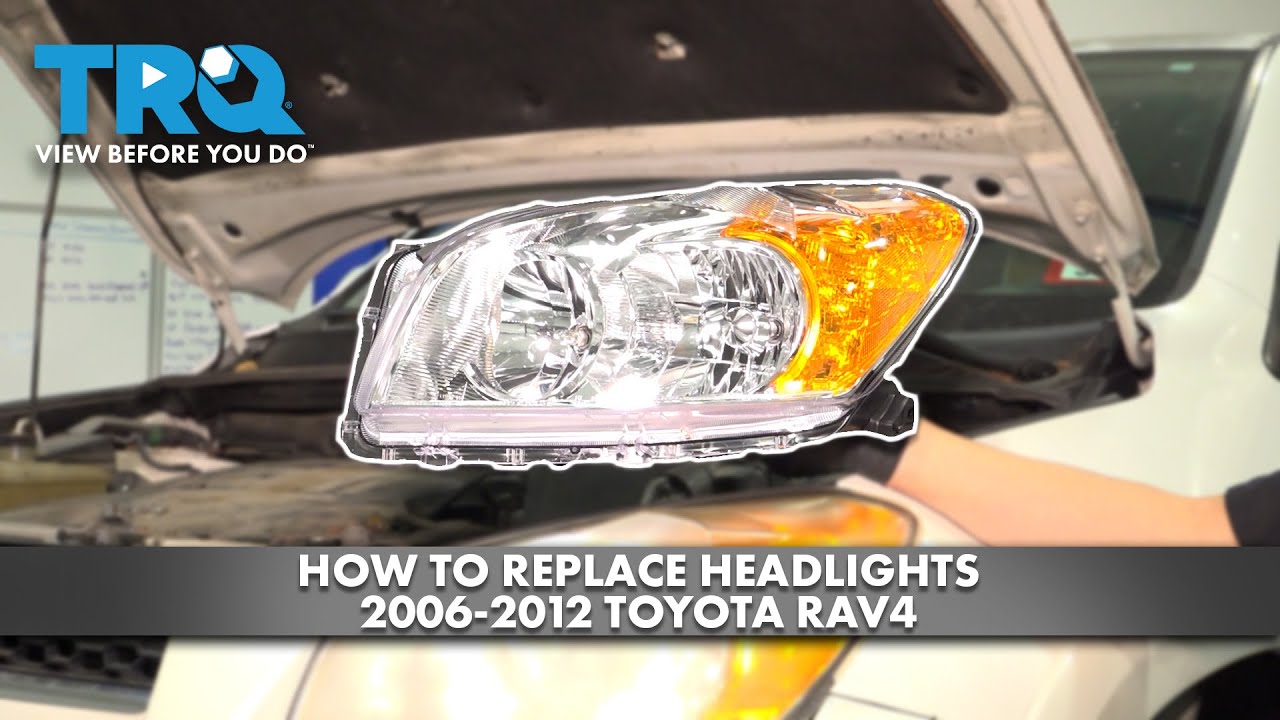
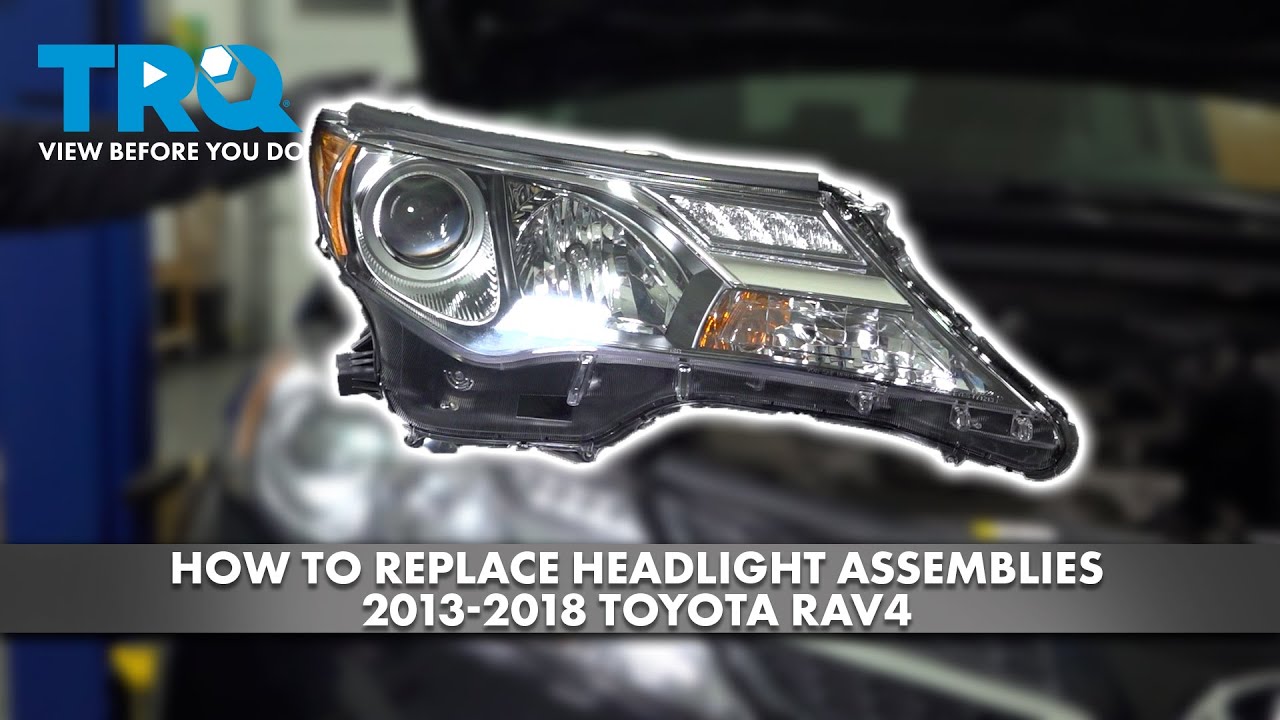
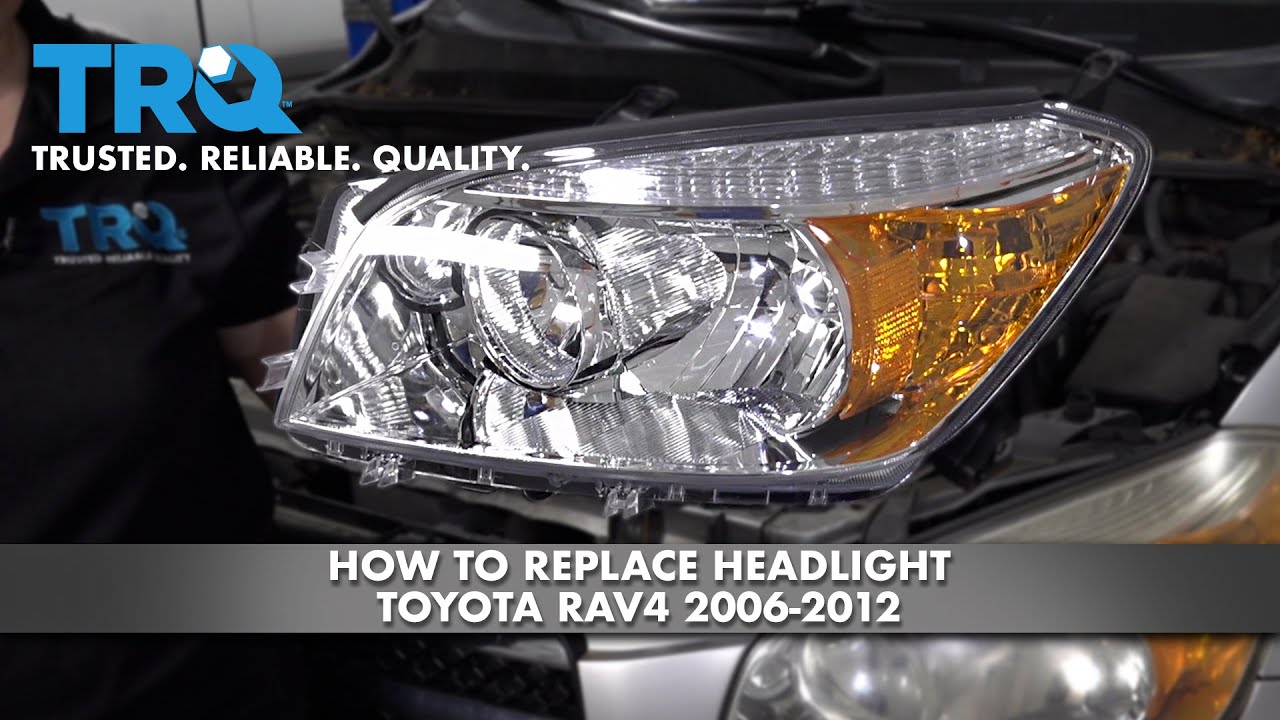
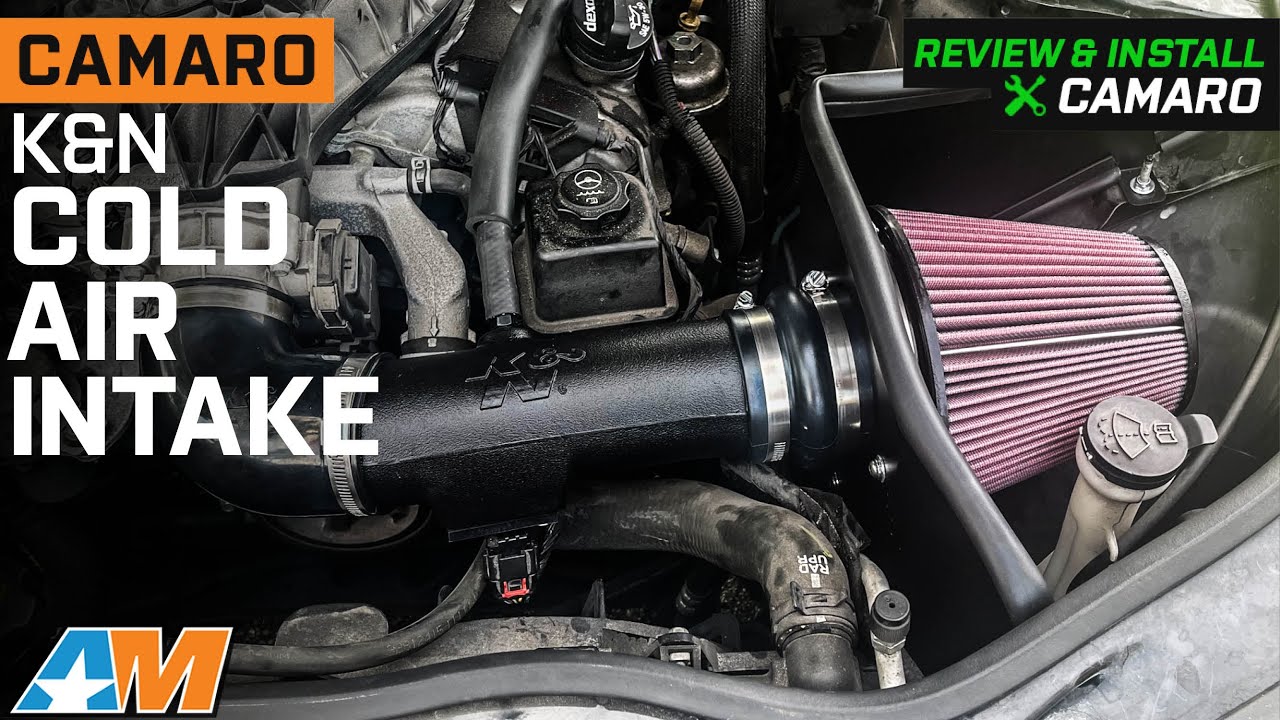
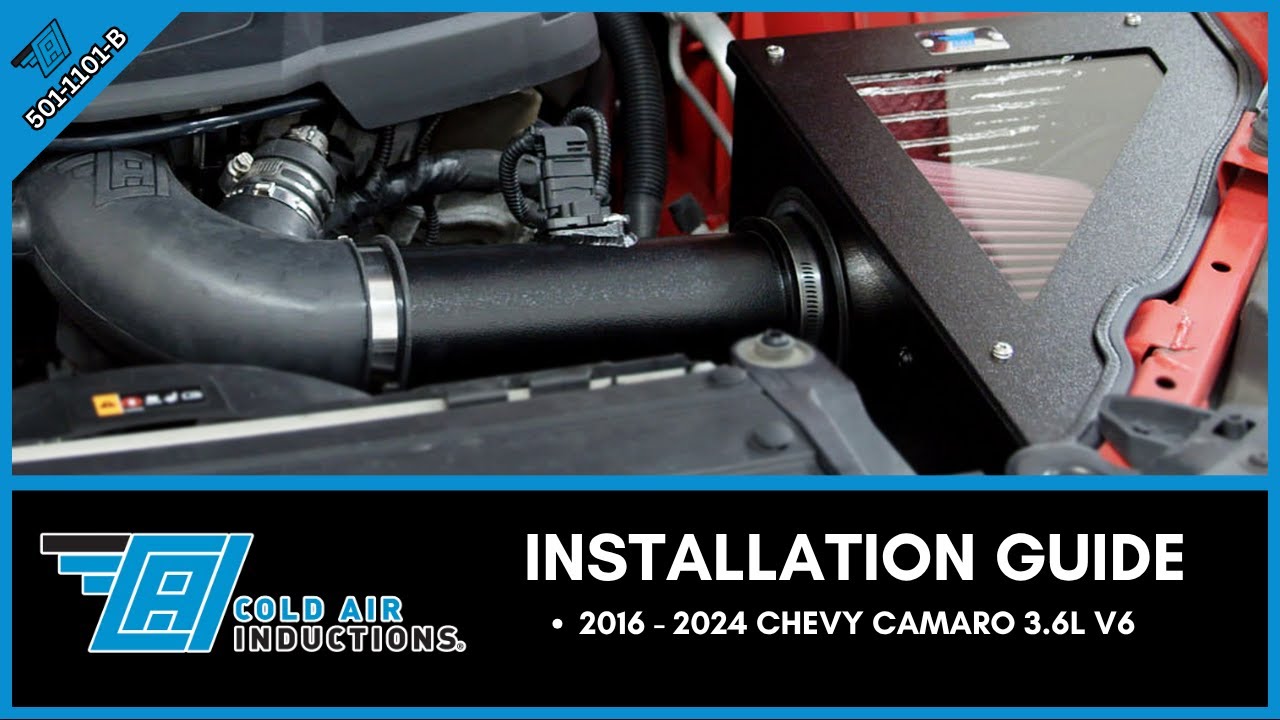

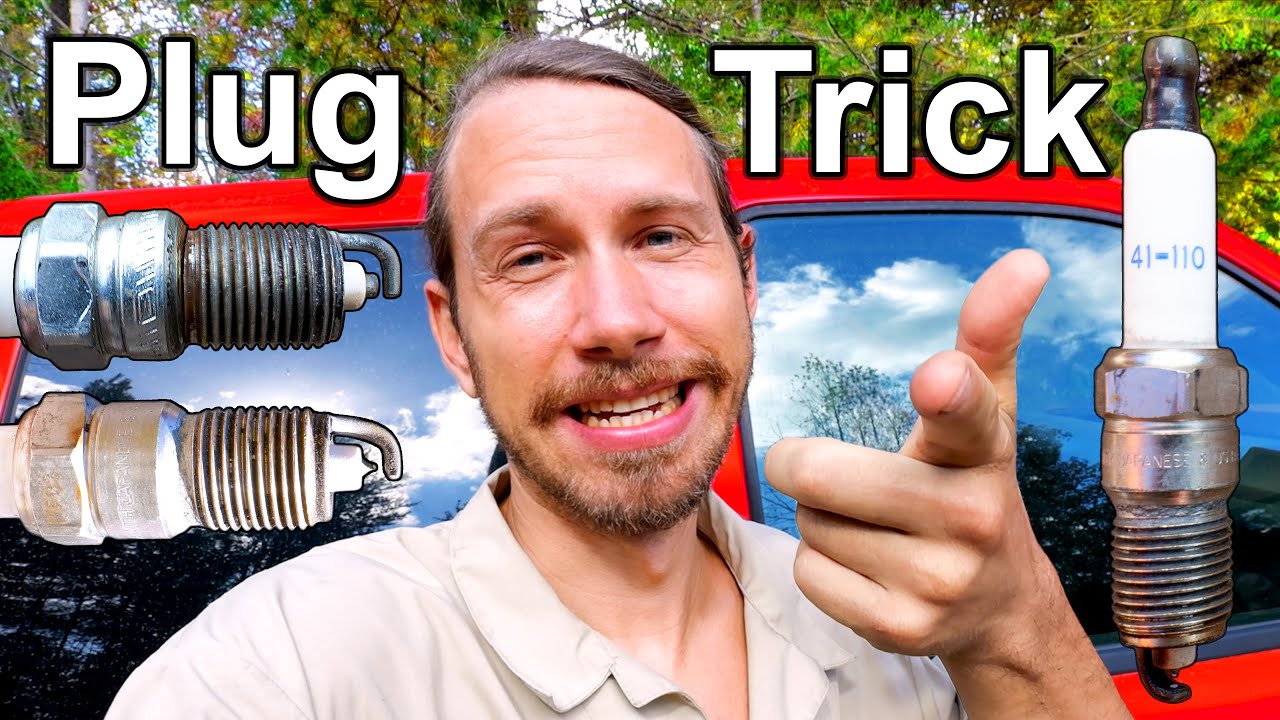
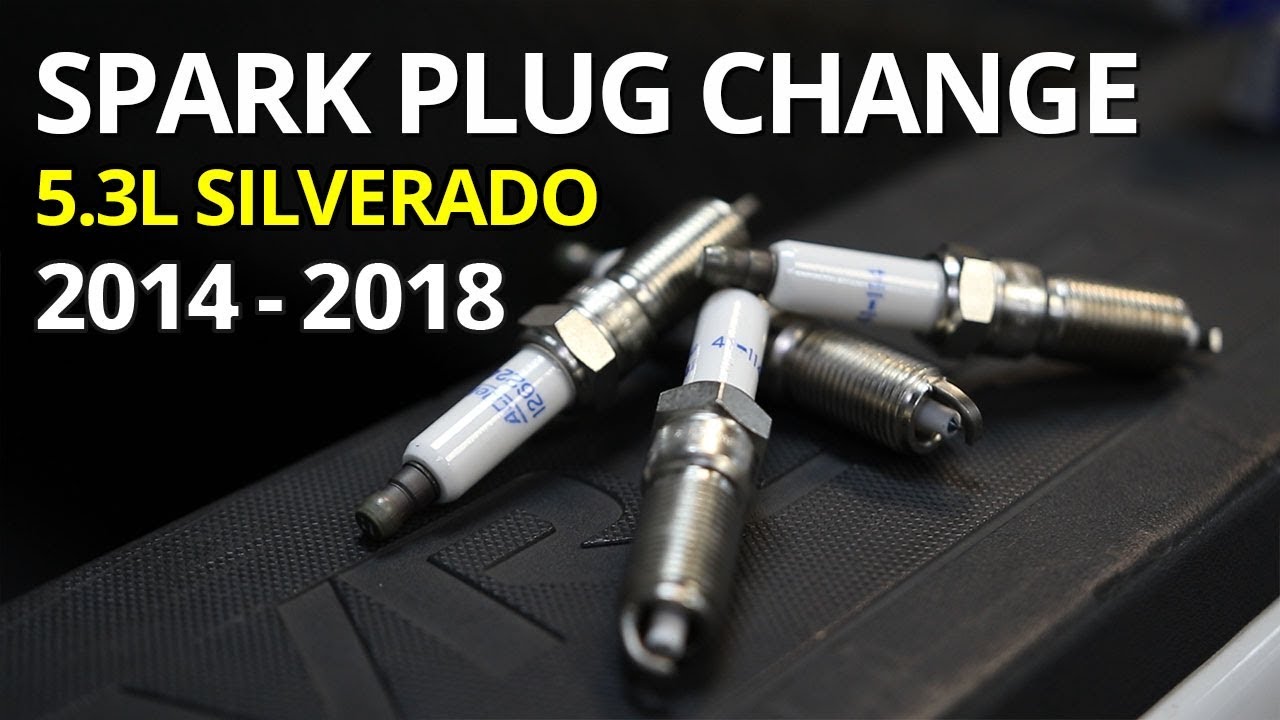


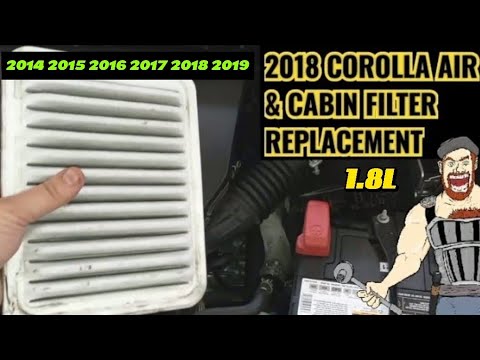


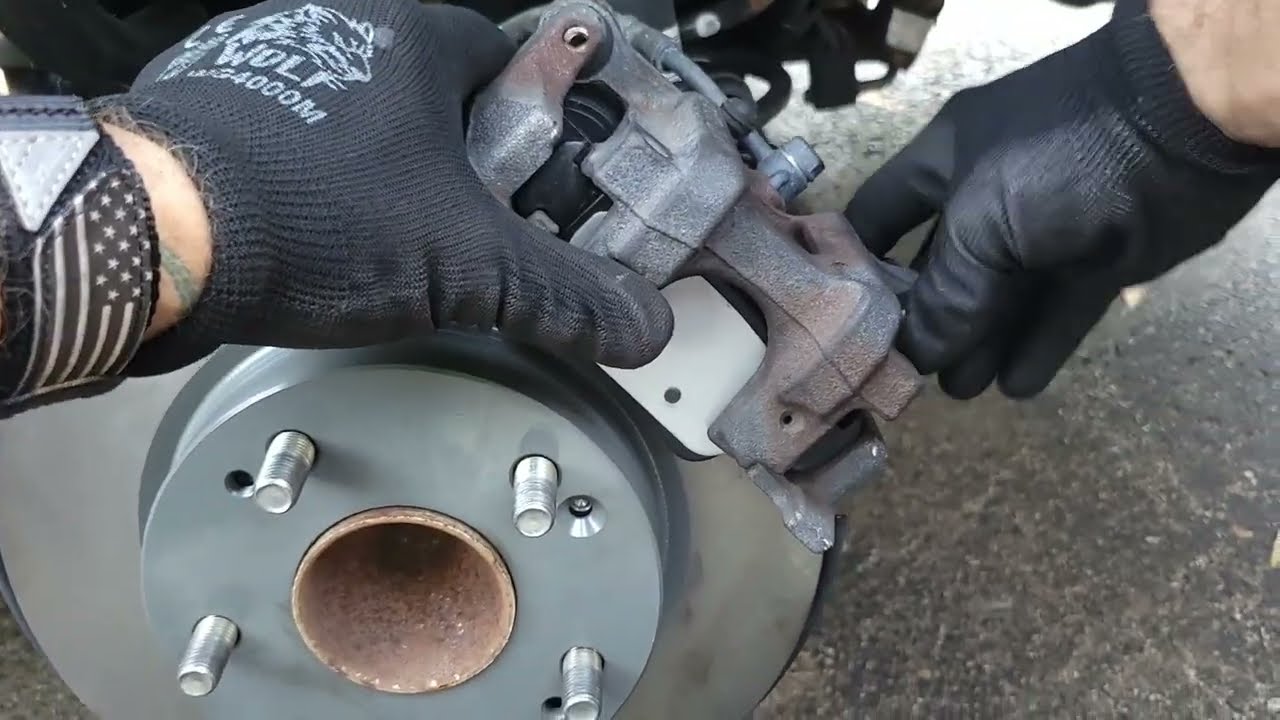
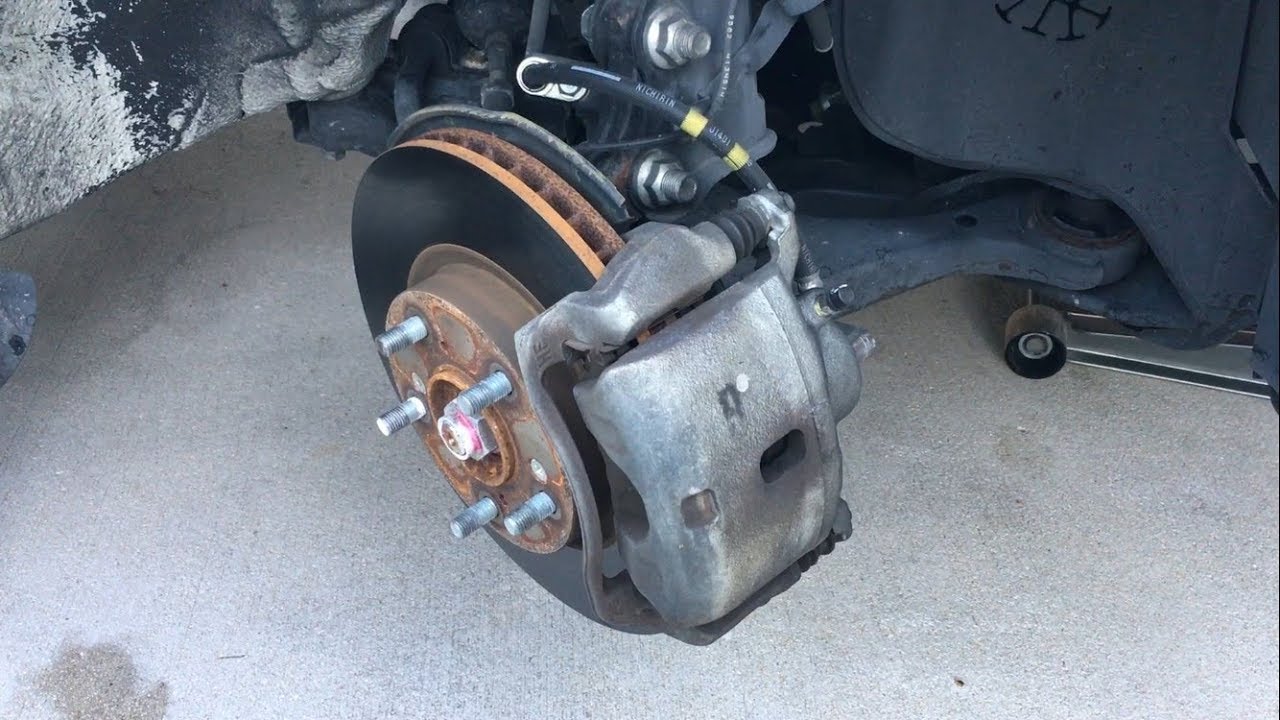

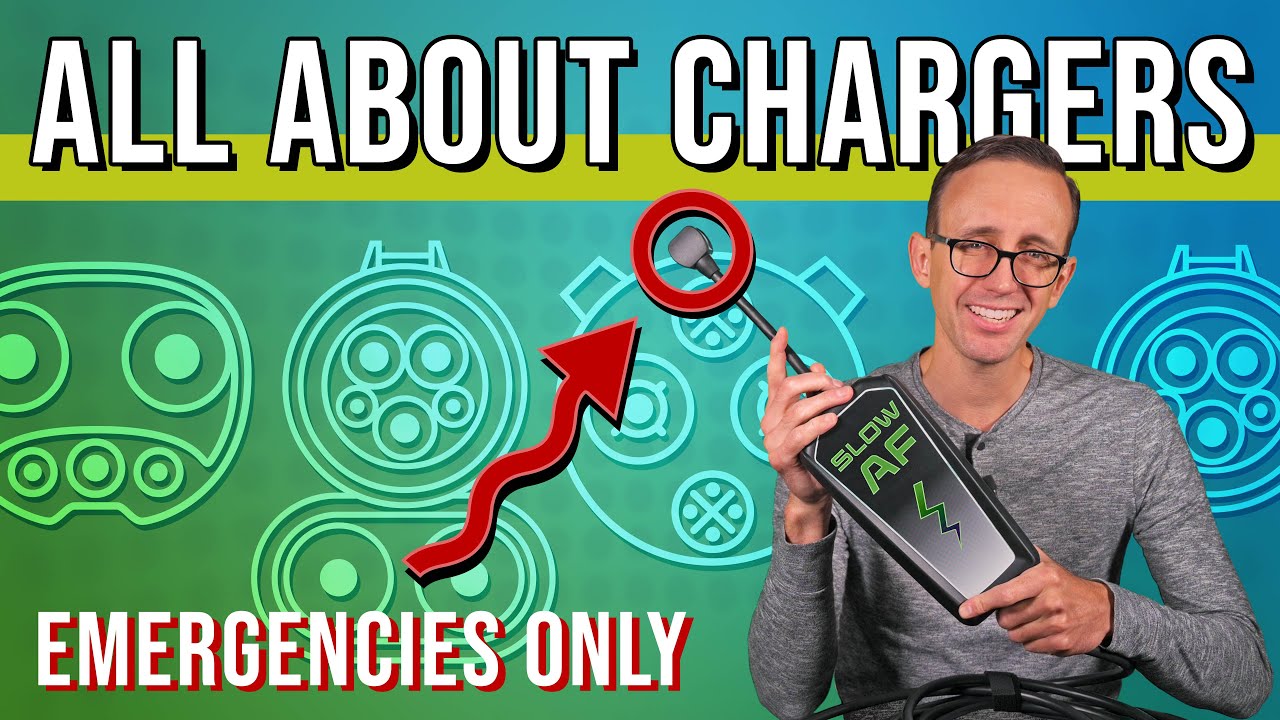
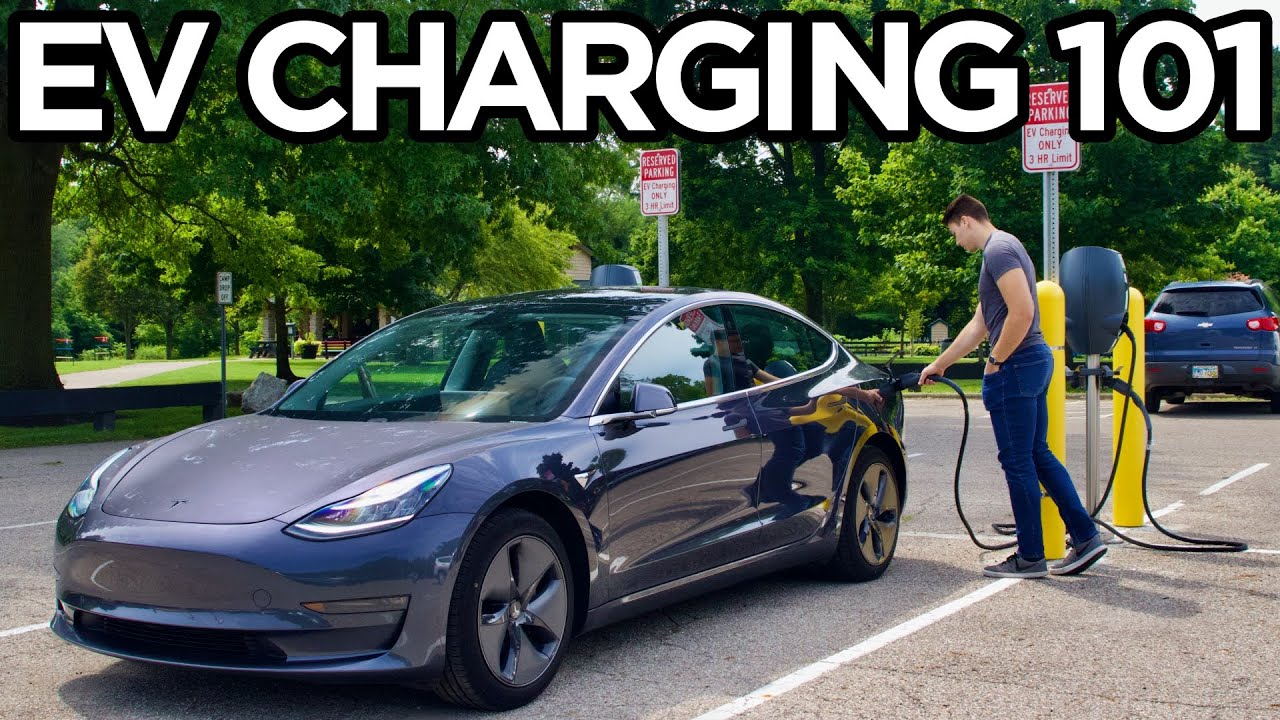


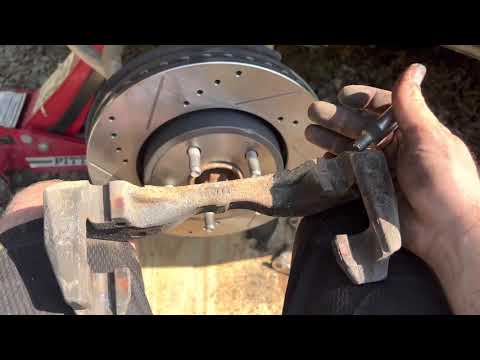
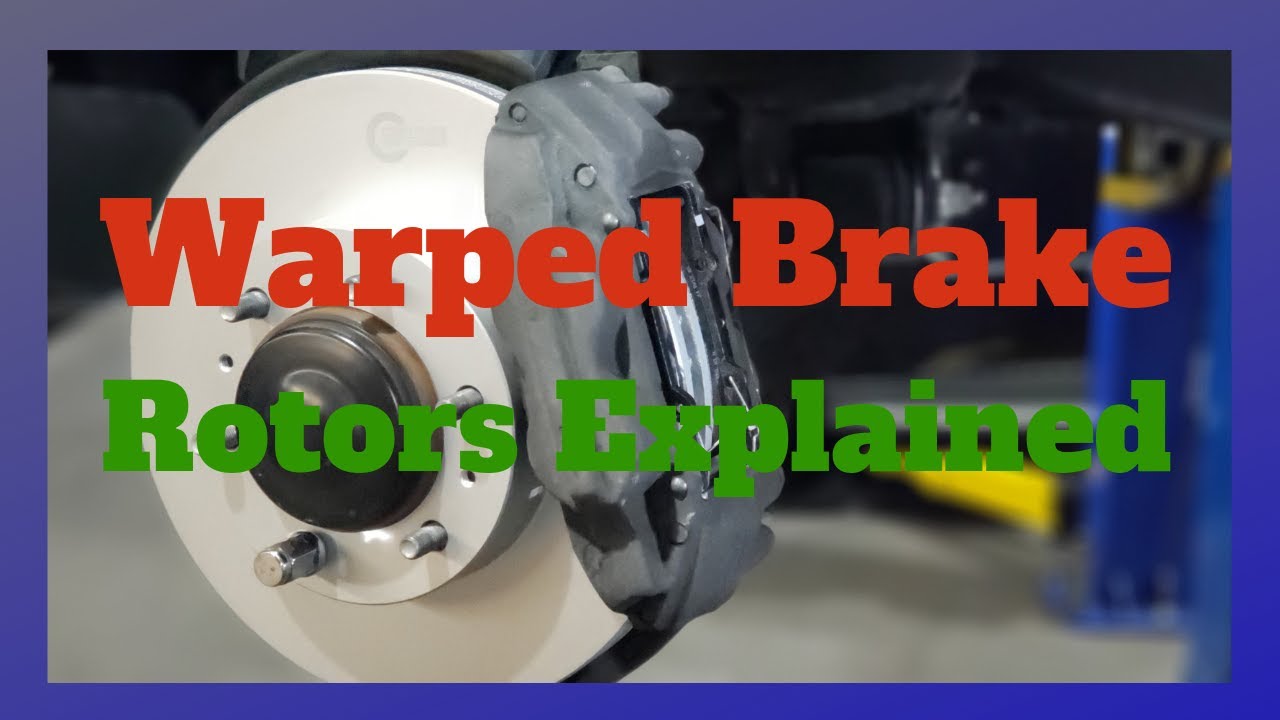

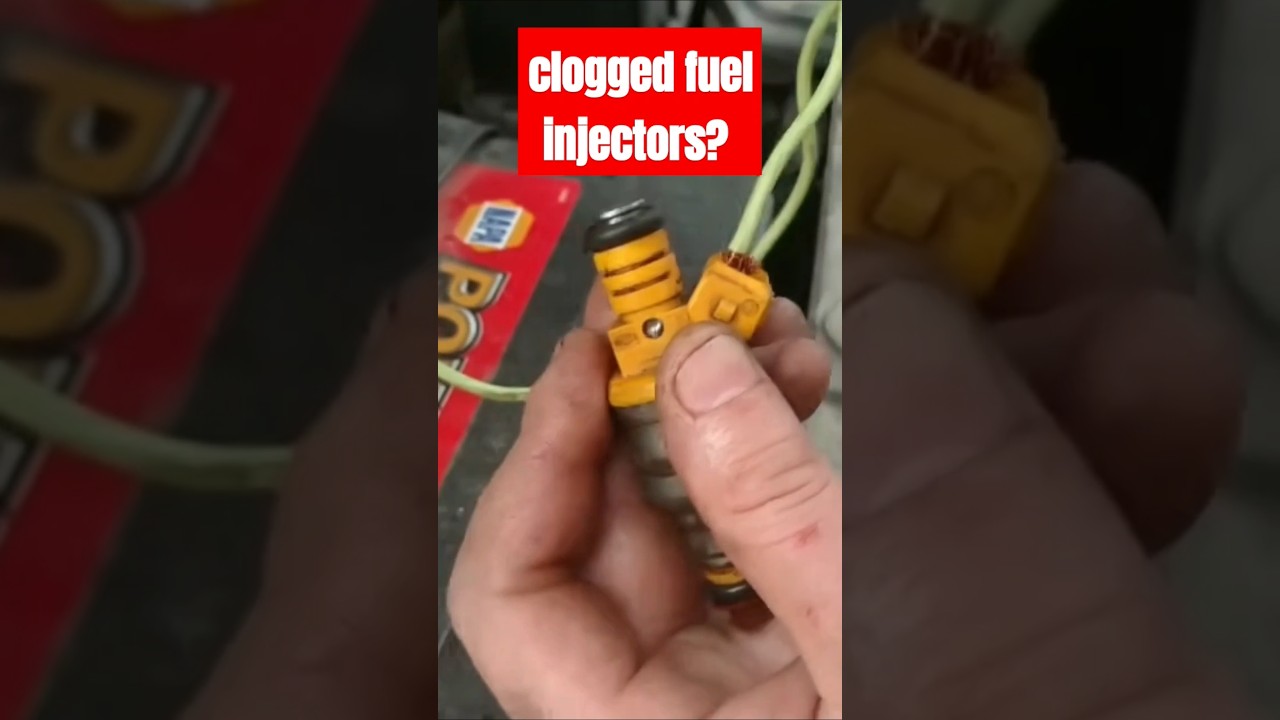
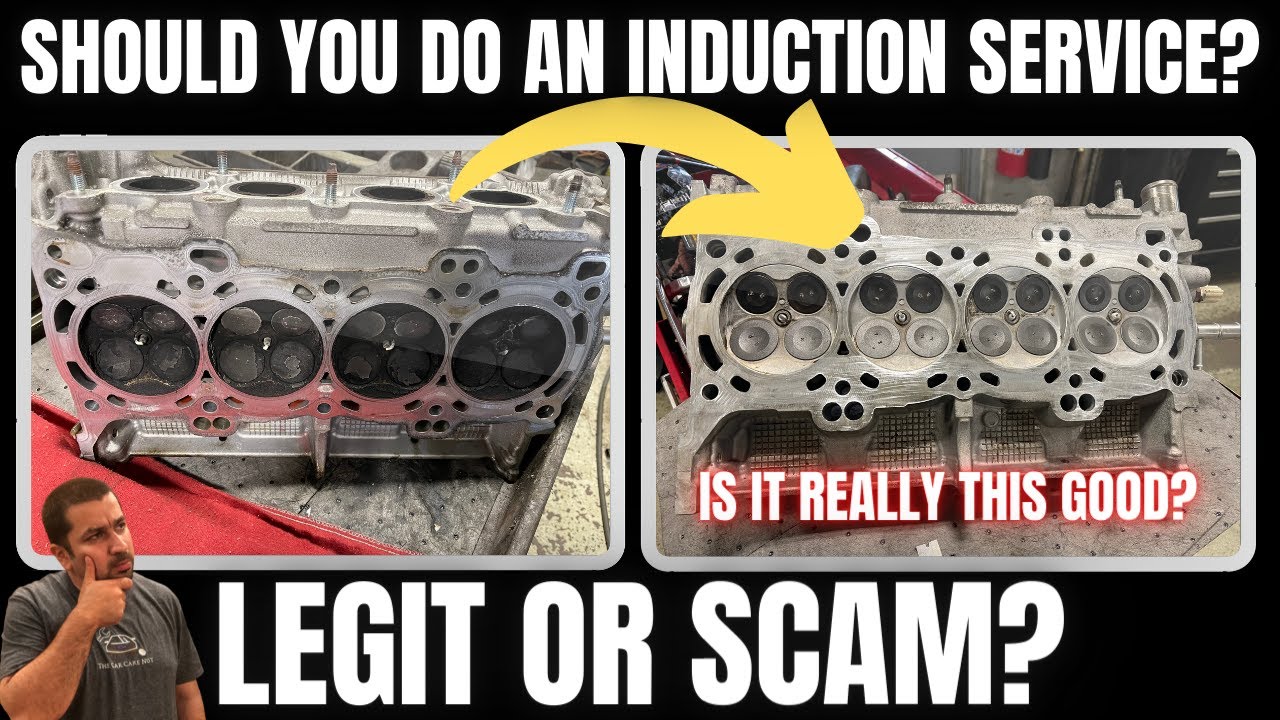


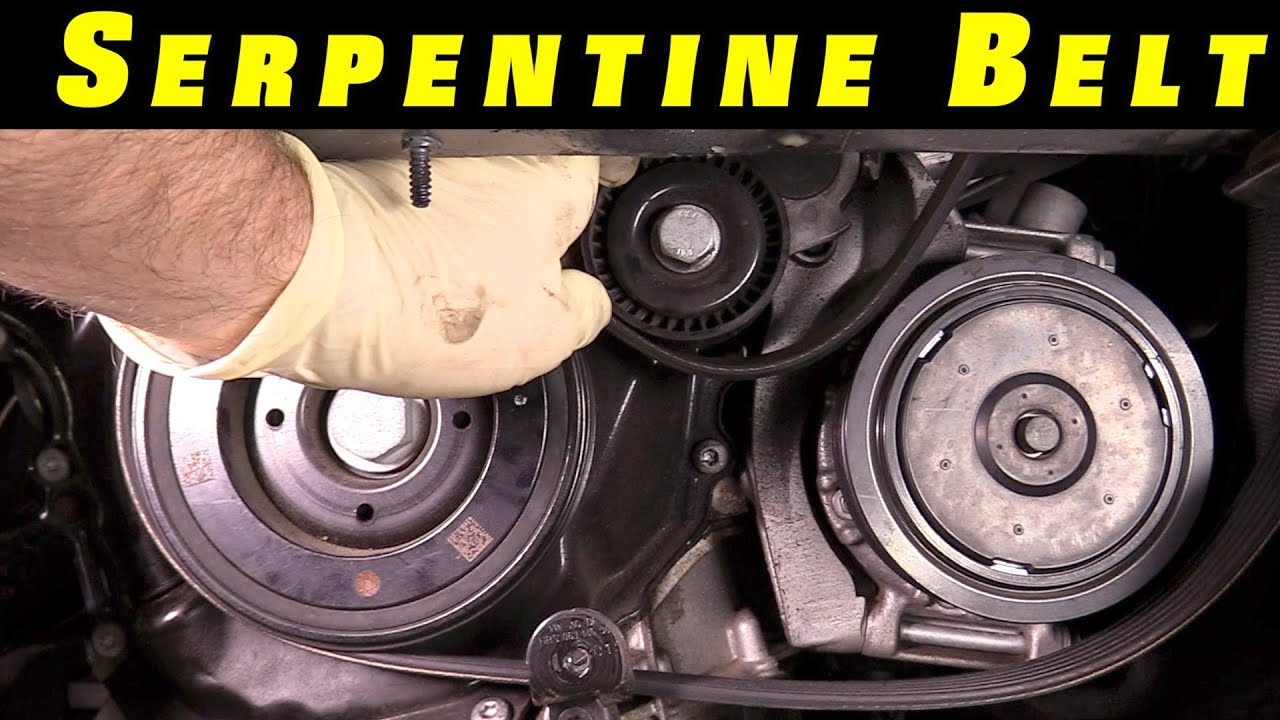
√ Watch the Video
√ Buy The Part at 1A Auto https://1aau.to/m-Shop-TRQ-Parts
√ Do it Yourself
√ Save Money
6:42 Saying Pause within in DIY Mechanical video is Diabolical
If you don’t remove the hub from the axle, be sure not to overextend your CV joint.
This car is from the rust belt
DO NOT USE VISE GRIPS ON THAT SWAY BAR LINKAGE !!!!! Use a 19mm open end wrench or else you’ll strip the hex nut backing nut