

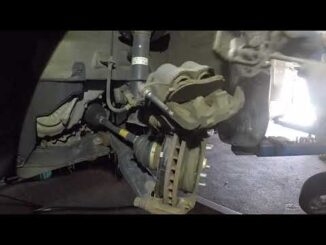
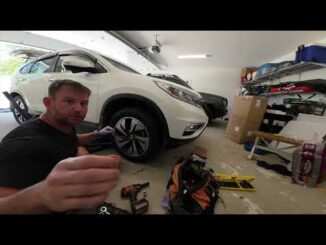
In this video,, we go over changing front and rear brake pads in a 2015 Honda CR-V.
Link to the brake pads that I bought.
Front: Bendix Premium Copper Free CFC914 Ceramic Brake Pad
Rear: Bendix Premium Copper Free CFC1086 Ceramic Brake Pad
In this video,, we go over changing front and rear brake pads in a 2015 Honda CR-V.
Link to the brake pads that I bought.
Front: Bendix Premium Copper Free CFC914 Ceramic Brake Pad
Rear: Bendix Premium Copper Free CFC1086 Ceramic Brake Pad
Due to factors beyond the control of RB The Mechanic, it cannot guarantee against unauthorized modifications of this information. RB The Mechanic assumes no liability for property damages or injury incurred as a result of […]
Replacing the Front brakes on a 2015 CR-V Part Number Akebono Brakes ACT1089A –
Comments are closed.
Copyright © 2026| Corner Storez | Hosted by EWS
No lube on pad ears or glide pins
You don’t know wgat your doing!
Almost at 100k miles on original pads. Amazing how long they last. Will be changing soon.
make sure when you jack the car up that you jack it up where the book tells you to,
block the wheels on opposite corners of the tire your taking off before jacking,
you could mess up the alignment jacking it up that way, all that weight on that support the car could slide off of it.
put the tire under the frame or use jack stands, just in case, the car falls.
it is unreal how many people have died or were seriously injured when the car fell on them, my best friend died that way,
“so safety is always the 1st thing”
unscrew the brake reservoir cap for when you depress the calipers and keep an eye on it so it doesn’t overflow,
take a wire brush and clean the surfaces for the new hardware, a can of brake cleaner works wonders,
put the grease on the back of each new pad where the caliper touches and on the sliding hardware,
then when done check the brake fluid level in the reservoir, clean off where the tire rim mounts against the rotor, both the rotor and the rim, tighten the lug nuts at 80lbs each with a torque wrench and you are done.
I realize this video is 3 years old, but your foot is not a torque wrench. Lube the backs and ends of the pads with a little grease, rough-up the discs with a sander and clean them off brake-clean. Nothing wrong with those pads.